The full studio journey from wet clay to a finished piece has five main stages: making the piece on the wheel or by hand, drying and trimming it, a first bisque firing, glazing, and a second glaze firing. In a shared studio, the whole process often takes around three to six weeks, depending on drying conditions and how often the kilns are fired.
When you first sit down with a lump of clay, it’s easy to imagine you’ll walk out with a finished mug that day. In reality, the pottery studio journey from wet clay to finished piece takes a little longer, and each step along the way changes the clay in a way you can’t skip. Understanding the process makes the wait far more enjoyable.
At Le Studio Art Space in Mordialloc, we walk every new member through this journey in their first weeks. This guide follows a single piece through a real studio, explaining what happens at each stage, who’s responsible for what, and roughly how long it all takes, so you know exactly what to expect.
Making The Piece
Every piece begins with clay that’s been wedged, a kneading process that removes air bubbles and gives the clay an even consistency. Air pockets can cause problems later, so this simple step matters more than it looks.
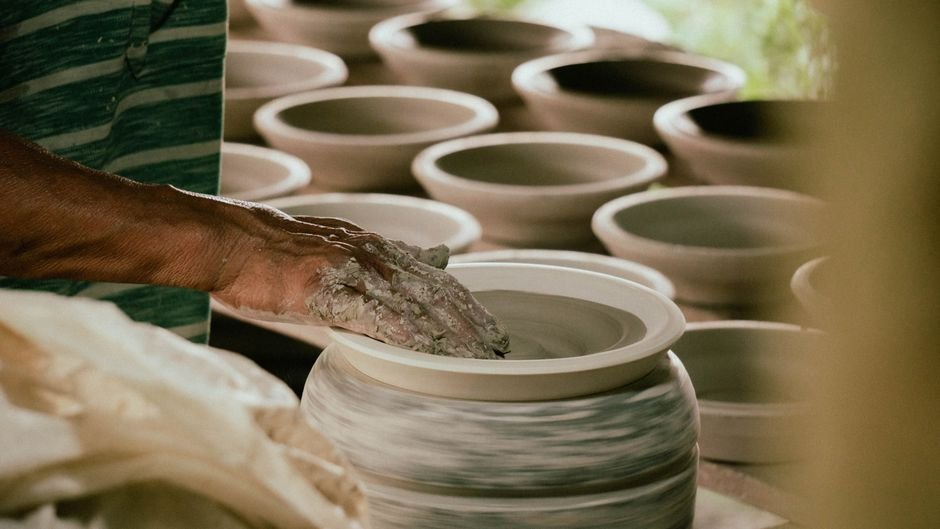
From there, the piece is shaped in one of two main ways. On the pottery wheel, clay is centred, opened, and pulled up into a form like a cup, bowl, or vase. With hand building, clay is pinched, coiled, or rolled into slabs and assembled by hand. Our guide on centering, throwing, and trimming explains the wheel steps in more detail.
Most beginners make their first pieces in a class, where an instructor guides them through each step. Members with more experience often work during open studio sessions, using the wheels and benches independently.
Before you leave, your piece needs to be marked so it can be identified later. Many studios ask you to scratch your initials or a mark into the base, then place the piece on a labelled shelf or board to begin drying.
It’s normal to make several pieces before you get one you love. Many potters say the real skill comes from repetition, and plenty of early attempts end up back in the reclaim bucket, which is all part of learning.
Drying And Trimming
Once a piece is made, it needs to firm up before anything else can happen. Within a day or two, depending on the weather and studio conditions, clay reaches the leather hard stage. It’s firm enough to handle but still soft enough to carve, trim, and join.
Leather hard is when wheel thrown pieces are usually trimmed. The piece goes back on the wheel upside down, and excess clay is shaved from the base to create a neat foot ring and even walls. It’s also the best time to add handles, carve patterns, or apply slip decoration.
After trimming, the piece needs to dry completely to what potters call bone dry. Slow, even drying is important, because pieces that dry too fast or unevenly can warp or crack. Covering pieces loosely with plastic helps slow things down, especially in hot or windy weather.
Drying can take anywhere from a few days to a couple of weeks, depending on the size of the piece, its thickness, and the season. Larger or thicker work generally needs more time. Our guide on the stages of clay from wet to fired explains each stage in more depth.
The Bisque Firing
Once bone dry, your piece is ready for its first trip to the kiln. This is the bisque firing, which turns fragile dry clay into hard, porous ceramic that can be handled and glazed safely.
In most studios, the bisque firing is handled by the studio, not the student. Pieces are placed on a bisque shelf, and someone experienced loads the kiln, packing pieces carefully so they fire evenly. In bisque firings, pieces can touch or even stack, since there’s no glaze to fuse them together.
The bisque firing usually reaches a lower temperature than the glaze firing, often around cone 04 in many studios. The full cycle, including heating and slow cooling, typically takes around a day or more.
At Le Studio Art Space, bisque firings run through our firing service, using the same kilns our members and local artists rely on for their own work.
When your piece comes out of the bisque kiln, it will feel lighter, sound slightly hollow when tapped, and usually be a pale pink, buff, or white colour. It’s much stronger than dry clay, but still porous, which is exactly what allows glaze to cling to the surface in the next step. Handle it with clean, dry hands, since oils and dust can cause glaze to resist.
Glazing And The Final Firing
Once your bisqueware comes out of the kiln, it’s time to glaze. Glaze is a coating of minerals and glass formers that melts into a glassy, protective, and often colourful layer during the second firing. Many studios have a range of tested glazes for members and students to choose from.
Before glazing, pieces are usually wiped with a damp sponge to remove dust. Glaze can be applied by dipping, pouring, or brushing, and the base and lower edge are kept clear or waxed so glaze doesn’t fuse the piece to the kiln shelf.
Glazed pieces then go on a separate shelf for the glaze firing. This second firing typically reaches a higher temperature, often mid fire, around cone 5 or 6, in many community studios. Pieces must not touch, since melted glaze will join them together.
Opening a glaze kiln is one of the most exciting moments in pottery. Colours that looked dull and chalky become rich and glossy, and you finally see how your piece has turned out. Our guide to kiln firing temperatures explains why the two firings differ.
What Competing Guides Leave Out About The Pottery Studio Journey From Wet Clay To Finished Piece
Most guides describe the steps but skip how long the pottery studio journey from wet clay to finished piece actually takes in a shared studio. Realistically, three to six weeks is common, and it can stretch further during busy periods or cool, damp weather when drying slows down.
Guides also rarely explain who does what. In many studios, students and members make, trim, and glaze their own work, while studio staff or a kiln manager handle loading and firing the kilns. Knowing this helps you understand why work waits on shelves between stages.
Kiln loads are another hidden factor. Studios usually wait until there’s enough work to fill a kiln before firing, because firing a half empty kiln wastes energy. Some studios also charge firing by shelf space or by weight, especially for members working outside a class.
Finally, not every piece makes it through. Cracks, warping, glaze faults, and the occasional kiln mishap are part of pottery for everyone, including experienced potters. In our experience, accepting that early makes the whole journey far less stressful.
Collecting Your Finished Piece At The End Of The Pottery Studio Journey
When your piece is ready, it usually goes onto a pickup shelf or a labelled area for finished work. Some studios let you know by message, while others expect members to check the shelves on their next visit.
Take a moment to check the piece over. Look for sharp glaze drips on the base, which can be gently sanded smooth, and check that any handles feel secure.
Before using your piece for food or drink, make sure the glaze you used is suitable. Many studio glazes are designed for functional ware, but not all are, so ask if you’re unsure.
Many potters keep a simple notebook or phone notes recording the clay, glaze, and thickness they used for each piece. When something comes out beautifully, or not quite as planned, those notes make it much easier to repeat the result or avoid the mistake.
Then enjoy it, and start thinking about the next one. Many people find the second and third pieces come together much faster once they understand the process. Our workshops and classes are a great way to begin, our guide on choosing a pottery studio membership explains the next step, and our ceramic studio is where members keep the journey going.

Ready to follow a piece all the way from wet clay to the glaze kiln? Start your own clay journey with a class at Le Studio Art Space in Mordialloc, where our team guides you through every stage.
Frequently Asked Questions
Why can’t I take my pottery home on the same day?
Wet clay needs to dry, be fired, glazed, and fired again before it’s finished. Each step takes time, so finished pieces usually come back weeks later.
How long does it really take to finish a pottery piece?
In a shared studio, around three to six weeks is common. Drying conditions, kiln schedules, and busy periods can make it shorter or longer.
Do I have to glaze my own pieces?
In most classes and memberships, yes, and many people find it one of the most enjoyable steps. Staff can help you choose and apply glazes if you’re unsure.
What happens if my piece cracks during drying?
Small cracks can sometimes be repaired while the clay is still workable, but larger cracks usually mean starting again. Slow, even drying helps prevent them.
Who loads the kilns at Le Studio Art Space?
Our firing service handles loading and firing the kilns, so members and students can focus on making and glazing. We’ll let you know how work moves through each firing stage.
This article is provided for general educational purposes by Le Studio Art Space. Timelines and processes vary between studios, materials, and seasons.