Sprigging is a ceramic decorating technique where small relief shapes, called sprigs, are pressed into a mould or shaped separately and then attached to the surface of a pot with slip before firing. The sprigs sit raised on the surface like little applied sculptures. It’s best known from Wedgwood jasperware, where white classical figures stand out against a coloured background.
You might come across the word sprigging in a pottery book, a museum label, or a decorating class and wonder what on earth it means. It sounds a bit like gardening, but the sprigging definition in ceramics is simple once you can picture it: small clay decorations made separately and stuck onto a piece, so they stand out in relief.
At Le Studio Art Space in Mordialloc, applied decoration is one of those techniques that beginners often fall in love with, because it’s hands on, forgiving, and gives satisfying results. This guide explains what sprigging is, how it’s done, where it comes from, how it differs from other relief techniques, and how to try it on your own work.
What Sprigging Means
A sprig is a small, shaped piece of clay used as decoration. It might be a leaf, a flower, a face, a geometric motif, or a little figure. Sprigging is the process of making these pieces and applying them to the surface of a pot, tile, or sculpture.
The key feature is that the decoration is made separately from the main piece. That’s what sets sprigging apart from carving into a surface or stamping it. The sprig is an addition, built up from the surface rather than cut into it.
Most sprigs are made using small moulds, which let you repeat the same shape many times. That repeatability is part of what makes sprigging so useful. You can create a border of identical leaves around a bowl or a row of matching motifs on a mug.
Sprigs are usually quite shallow, a few millimetres thick. The result is a low relief decoration that catches the light and adds texture and detail. When glaze is applied over a sprig, it often pools around the edges, which highlights the shape beautifully.
Put simply, the sprigging definition is this: separately made relief decoration, attached with slip, fired as part of the piece. Once that idea clicks, you’ll start noticing sprigs on historic and contemporary ceramics everywhere.
How A Sprig Is Made And Attached
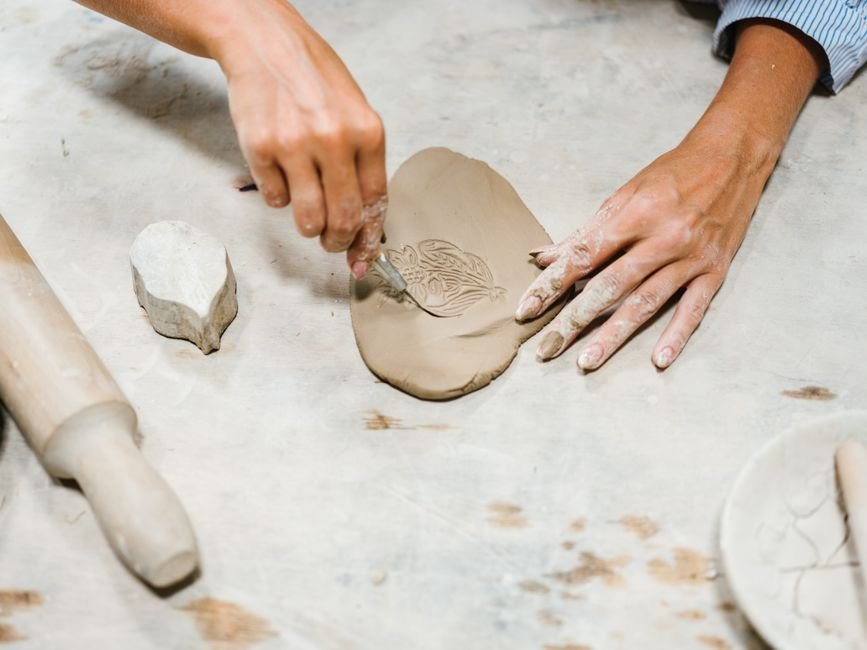
The most common method uses a press mould. These are small moulds, often made from plaster or bisque fired clay, with a carved or impressed design. You press a small ball of soft clay firmly into the mould, then scrape the back flat with a flexible rib or knife.
Next comes release. Because plaster and bisque absorb moisture, the clay usually loosens from the mould after a short time. Many potters gently lift it out with a small ball of clay pressed against the back, or tap the mould to release the sprig.
Then you attach it. The surface of the pot needs to be leather hard, firm enough to hold its shape but still slightly damp. You lightly score or dampen the area, brush on a little slip, and press the sprig into place, gently smoothing the edges so it bonds well.
Timing matters. Both the sprig and the pot should be at a similar moisture level, so they shrink at a similar rate as they dry. A very wet sprig on a dry pot is a recipe for cracks. If you’d like a refresher on moisture levels, our guide to the stages of clay from wet to fired explains each stage.
You don’t need to make moulds yourself to start. Many potters carve a simple design into a small block of clay, bisque fire it, and use that as their first sprig mould. Others use found objects like buttons or shells pressed into clay.
Where Sprigging Comes From
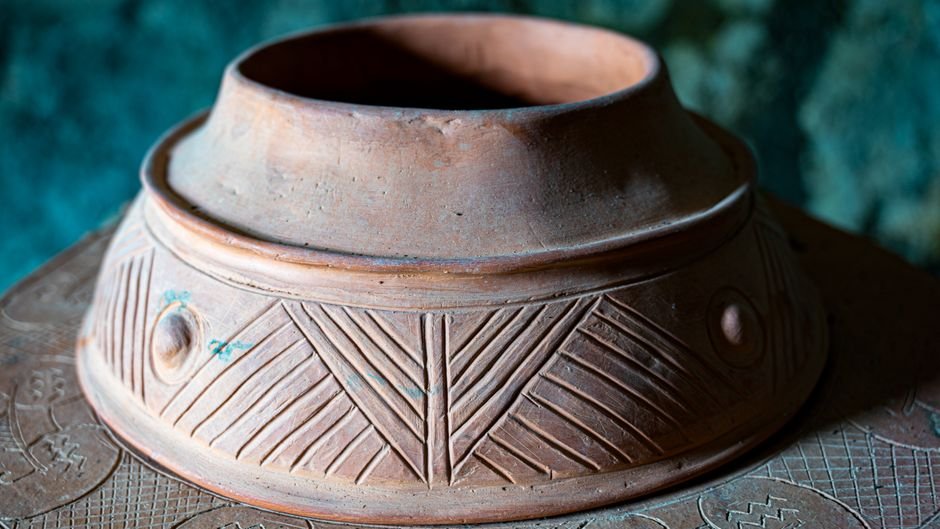
Applied relief decoration is very old, and potters in many cultures have added moulded or shaped clay to their work. In China, Dehua porcelain cups and pots were sometimes decorated with sprigged plum blossom, and European porcelain factories copied the style in the eighteenth century.
In England, sprigging became a defining feature of Staffordshire pottery in the eighteenth century. The technique is often credited to Staffordshire potters such as John Astbury, who used applied relief decoration on red and cream wares.
The most famous example is Wedgwood jasperware. Josiah Wedgwood developed jasperware in the 1770s after thousands of experiments, and used it to create pieces with white sprigged figures and motifs on blue, green, black, and other coloured backgrounds. His copy of the Portland Vase, completed around 1790, showed just how refined sprigging could be.
Those classical scenes, with their delicate figures and garlands, are what many people picture when they hear the word sprigging. Today, the technique is used by potters everywhere, from traditional reproductions to bold contemporary designs. Some makers use sprigs to add playful details like tiny animals or initials, while others build up dense, textured surfaces from dozens of small applied pieces.
Sprigging Versus Other Relief Decoration
Sprigging is one of several ways to create raised or textured surfaces, and it helps to know the differences. Carving removes clay from the surface, cutting lines or shapes into it. The design sits below or level with the surface rather than standing above it.
Stamping presses a tool or texture into the clay. That creates an impressed design, usually sunken into the surface. Our guide to how pottery stamps add texture explains this approach.
Applied coils and hand modelled additions are close cousins of sprigging. Instead of using a mould, you roll, pinch, or shape the clay by hand and attach it. These pieces tend to be more individual and less repeatable than moulded sprigs.
The main thing that sets sprigging apart is the combination of separate making and repeatability. Moulded sprigs let you create consistent, detailed relief decoration that would take far longer to carve or model by hand each time.
What Competing Guides Leave Out About The Sprigging Definition
Most guides explain the sprigging definition and show pretty examples, but they rarely explain why sprigs pop off. It’s one of the most common frustrations for beginners, and it usually comes down to a few causes.
The biggest is a moisture mismatch. If the sprig is much wetter than the pot, it shrinks more as it dries and pulls away at the edges. Keeping both at a similar leather hard stage makes a big difference.
Weak joins are another cause. Skipping slip, using too little, or not pressing the sprig firmly enough leaves a gap that can open up during drying or firing. Gently pressing from the centre outward helps push out air and form a good bond.
Drying too fast also causes trouble. Sprigged pieces benefit from slow, even drying, often loosely covered with plastic for a day or two. That gives the sprig and the body time to shrink together.
Finally, thick sprigs can trap air or dry unevenly. Keeping sprigs thin and pressing the back flat reduces the risk. If a sprig does come loose at the greenware stage, it can sometimes be reattached with a little slip and careful drying.
Trying Sprigging On Your Own Pieces
Start simple. Make a small press mould by carving a leaf or shape into a pad of clay and bisque firing it, or use a ready made mould if your studio has some. Practise pressing and releasing sprigs until you get clean results.
Next, apply a few sprigs to a leather hard cup, bowl, or tile. Focus on matching moisture levels, using slip, and pressing firmly. Don’t worry about perfect placement on your first try.
Consider contrasting colours. A white clay sprig on a darker clay body, or the other way round, creates the classic jasperware effect. Even without contrasting clays, a glaze that breaks over raised edges can make sprigs stand out.
A decorating or hand building session is a great place to learn, because someone can check your joins and drying. Our workshops and classes cover applied decoration, members of our ceramic studio can practise in their own time, and our firing service will take your sprigged pieces through the kiln.
Ready to add some raised decoration to your pots? Try sprigging and other applied relief techniques in a hands on workshop at Le Studio Art Space in Mordialloc, with guidance on joins, drying, and firing.
Frequently Asked Questions
Is sprigging hard for beginners?
Not really. Pressing and attaching sprigs is fairly simple, and the main skill is managing moisture so they stay attached. Many beginners enjoy it from the first try.
Why do my sprigs keep falling off?
Usually the sprig and pot were at different moisture levels, the join was weak, or the piece dried too quickly. Matching dampness, using slip, and drying slowly help.
Do I need special moulds for sprigging?
No. You can make a simple mould by carving a design into clay and bisque firing it, or by pressing an object into clay. Plaster moulds are also common.
Can I glaze over sprigs?
Yes. Glaze often pools around raised edges, which can highlight the design. Thick or runny glazes may blur fine detail, so test first.
Can I learn sprigging at Le Studio Art Space?
Le Studio Art Space runs workshops and classes that cover hand building and surface decoration, including applied relief techniques. It’s a friendly way to try sprigging with guidance.
This article is provided for general educational purposes by Le Studio Art Space. Results vary with clay body, moisture, and firing conditions.