The best clay projects for a single studio session are small, simple forms you can finish shaping in two to three hours, such as pinch pots, small slab dishes, coil-built planters, spoon rests, or a simple thrown cylinder. Keep in mind that drying and firing happen after you leave, so plan on returning or arranging collection in a week or two.
Booking a studio session is exciting, and when it comes to clay projects it’s tempting to arrive with a big plan, maybe a full dinner set or a tall sculptural vase. Then the clock starts ticking, the clay has its own ideas, and suddenly the session is over with a half-finished piece and a few regrets.
At Le Studio Art Space in Mordialloc, we help members plan their visits all the time, and the happiest sessions usually start with a realistic, achievable project. This guide covers clay projects that genuinely suit a single session, what to save for later, and how to plan around the fact that clay needs to dry and be fired after you leave.
What Makes Clay Projects Realistic For One Session
Time is the obvious limit. Most studio sessions run for a couple of hours, and a good chunk of that goes on setting up, wedging clay, and cleaning up afterwards. That usually leaves somewhere around ninety minutes to two hours of genuine making time, which is less than people expect.
Drying is the less obvious limit. Clay changes as it dries, moving from soft and wet to leather hard and eventually bone dry. Many steps, like trimming a thrown pot or attaching a handle firmly, need the clay to reach leather hard first, which can take hours or even a day. If a project depends on those steps, it can’t be completed in one visit.
Complexity is the third factor. Pieces with lots of joins, fine details, or multiple parts take longer and carry more risk of cracking. A simple form done well almost always looks better than a complicated one rushed to meet the end of a session.
A realistic single-session project is one you can shape, refine, and sign in one sitting, then leave to dry on a shelf. If it needs you to come back, that’s fine too, as long as you plan for it from the start.
Simple Hand Building Projects To Try
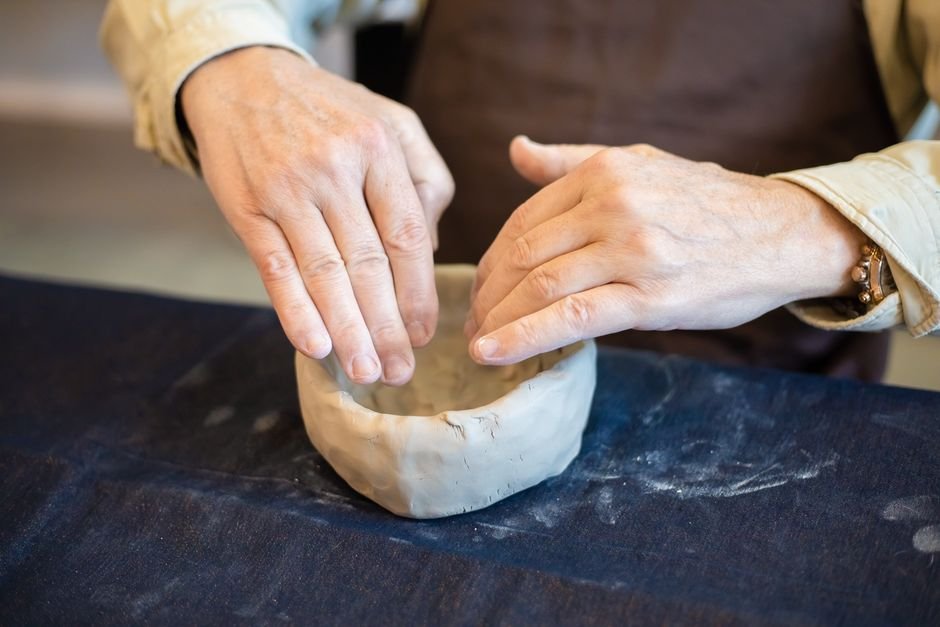
Pinch pots are the classic starting point. You press your thumb into a ball of clay and gradually pinch the walls outward, turning as you go. They’re quick, forgiving, and endlessly adaptable into small bowls, tea light holders, or little planters with a drainage hole.
Small slab dishes are another excellent choice. Roll out a slab of clay, cut a shape like a circle, leaf, or rectangle, and gently lift the edges or drape the slab over a form to create a curve. Trinket dishes, spoon rests, and small serving plates all work beautifully and can be finished comfortably in a session.
Coil work suits people who like a steady, meditative rhythm. A small coil-built pot or planter, with coils either smoothed or left visible for texture, is achievable in a couple of hours if you keep it modest in size. If you’d like a refresher on these techniques, our guide to coil, slab, and pinch methods explains each one.
Textured tiles, simple ornaments, and small wall hangings are also great options, especially if you enjoy pressing leaves, lace, or stamps into clay. They’re flat, dry evenly, and fire reliably.
Whichever hand building project you pick, keep walls fairly even, roughly the thickness of a pencil, and avoid trapping air inside closed shapes. Those two habits alone prevent many of the cracks and firing problems beginners run into. It’s also worth making your piece a little bigger than you want the final result to be, since clay shrinks noticeably as it dries and fires.
Wheel Thrown Projects For A Single Visit
If you’re comfortable centring clay, a simple cylinder is the most useful single-session wheel project. It teaches you to open, pull walls, and shape, and it can become a cup, a pen holder, or a small vase once it’s dried and fired. Throwing a few cylinders and keeping the best one is a great way to use a session.
Small bowls are another realistic option. A shallow bowl or ramekin is quicker to throw than a tall form and more forgiving if the walls wobble a little. Many potters throw several small bowls in a row, which builds muscle memory quickly.
The catch with wheel work is trimming. Most thrown pieces need their base trimmed once they reach leather hard, which is usually the next day or later. You can leave pieces untrimmed if you cut them carefully off the wheel and tidy the base with a sponge, but for a more refined finish you’ll need to return.
Beginners often find it helpful to focus on practice rather than keepers. If you’re newer to the wheel, our workshops and classes are a supportive way to build skills before independent sessions.
Projects Best Saved For A Multi Session Plan
Some projects simply won’t fit into one visit, and being honest about that saves frustration. Mugs with handles are the classic example. The body is thrown first, trimmed at leather hard, then the handle is pulled and attached, which usually spans at least two sessions.
Lidded jars, teapots, and anything with multiple fitted parts also need several visits, since each part must be made, dried to the right stage, and fitted together. Large sculptural work often needs to be built in stages, letting lower sections firm up before adding weight above.
Matching sets, like four identical bowls or a dinner set, take longer than they seem because consistency requires practice. It’s usually easier to make a few, see how they turn out, and refine over several sessions.
None of these are off limits. They just work best as part of a plan, which is where studio membership can help, since it gives you regular access to come back as pieces reach the right stage.
What Competing Guides Leave Out
Most project lists ignore what happens after the session, but drying and firing timelines are a huge part of planning. After you finish shaping, your piece needs to dry slowly and completely, which can take several days to a week depending on thickness and weather. Then it’s bisque fired, glazed, and glaze fired, which adds more time.
That means you usually can’t take a finished, fired piece home on the same day. Depending on the studio’s kiln schedule, the full journey from wet clay to finished pottery can take two to four weeks. If you’re making a gift, it’s worth starting early.
Planning around a single booking works best when you decide in advance whether you’ll return to glaze your piece or have the studio finish it for you. Some studios offer a clear glaze option, others encourage you to come back and choose colours. Our guide to the stages of clay from wet to fired explains this journey in more detail.
It’s also smart to leave the last fifteen minutes for cleanup and wrapping. Pieces that need more work later should be covered loosely in plastic, labelled with your name, and placed on the right shelf.
Choosing Clay Projects That Match Your Skill Level
For complete beginners, pinch pots, slab dishes, and textured tiles are ideal. They teach you how clay responds to pressure and moisture without too many technical hurdles, and the results are satisfying and useful.
If you’ve done a few sessions, try combining techniques, like a slab-built box with a pinched lid knob or a coil-built pot with a pressed texture. You could also practise throwing cylinders and bowls with a focus on even walls.
More confident potters can use single sessions for focused practice, like throwing ten cylinders of the same height or testing surface textures on small tiles. It’s also a good time to explore ideas from our clay art ideas list at a small scale before committing to bigger pieces.
Whatever your level, choose a project you’ll enjoy, not just one that sounds impressive. In our experience, people who choose projects that match their current skills leave happier and return more confident. Members of our ceramic studio can also use our firing service to finish their work.
Planning your next studio visit? Chat with the team at Le Studio Art Space in Mordialloc about a project that fits your time and skill level, and we’ll help you make the most of every minute at the wheel or bench.
Frequently Asked Questions
Can I really finish a clay project in one studio session?
You can finish shaping a simple project in one session, but drying and firing happen afterwards. Expect to wait a couple of weeks before collecting the fired piece.
What’s the easiest clay project for a total beginner?
A pinch pot is usually the easiest place to start. It needs no tools, teaches you how clay behaves, and can become a small bowl or planter.
Is making a mug too ambitious for one visit?
A mug with a handle usually needs at least two sessions, since the body has to firm up before trimming and adding the handle. It’s a great goal, just plan for a return visit.
Do I need to bring my own clay and tools?
Most studios provide clay and basic tools, though policies vary. At Le Studio Art Space we can let you know what’s included before your session.
What happens if I don’t finish my project in time?
Your piece can usually be wrapped in plastic and stored until your next visit. Clay stays workable for a while if it’s covered well, though it’s best to return within a few days.
This article is provided for general educational purposes by Le Studio Art Space. Session lengths, drying times, and firing schedules vary between studios and projects.