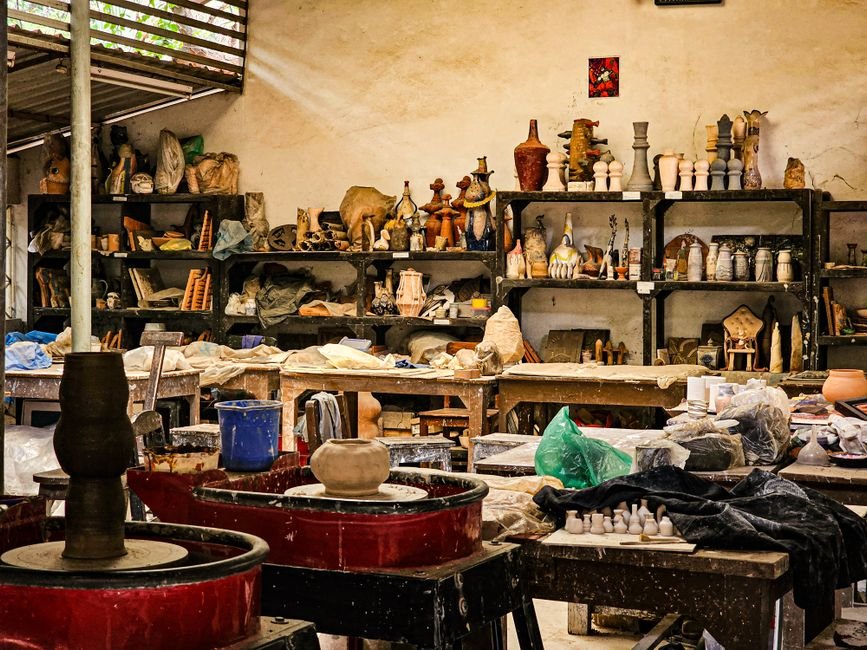
A working ceramic studio layout is usually divided into zones: a wheel area for throwing, hand building and wedging tables for preparing and shaping clay, drying shelves for work in progress, a glazing area with glaze buckets and brushing space, and a separate, ventilated kiln room. Each zone keeps a different stage of the process organised, clean, and safe.
The first time you walk into a ceramic studio, it can feel like a lot to take in. There are spinning wheels, buckets of mysterious liquids, shelves full of half finished pots, and a room with a big metal box humming away in the corner. Understanding a working ceramic studio layout makes the space feel friendly and familiar surprisingly quickly.
At Le Studio Art Space in Mordialloc, we give new students and members a quick tour before their first session. This guide is that tour in written form, explaining what each area is for, why it’s arranged the way it is, and how you’ll fit into the space on your first visit.
The Wheel Area
The wheel area is usually the busiest part of the studio. It’s where pottery wheels sit in a row or cluster, each with a stool and a splash pan, the removable tray that catches water and clay spinning off the wheel head. Throwing is messy, so wheels are often grouped together to keep the splatter in one place.
Each wheel station typically has a water bucket, a sponge, and a small set of tools like a needle tool, wire, and rib. Bats, the removable discs that pots are thrown on, are usually stored nearby so they’re easy to grab and swap. Our guide to the parts of a pottery wheel explains each component.
Wheels are generally placed near a sink and away from the glazing area. That way, clay and water stay in one zone and don’t contaminate glazes or finished work.
There’s also a practical reason for grouping them. In classes, an instructor can see and help everyone at once, and students learn a lot by watching the person next to them.
Most wheel areas also have a shelf or trolley nearby for freshly thrown pots. That keeps wet work out of the way while it firms up, without carrying it across the studio and risking a bump.
The Hand Building And Wedging Tables
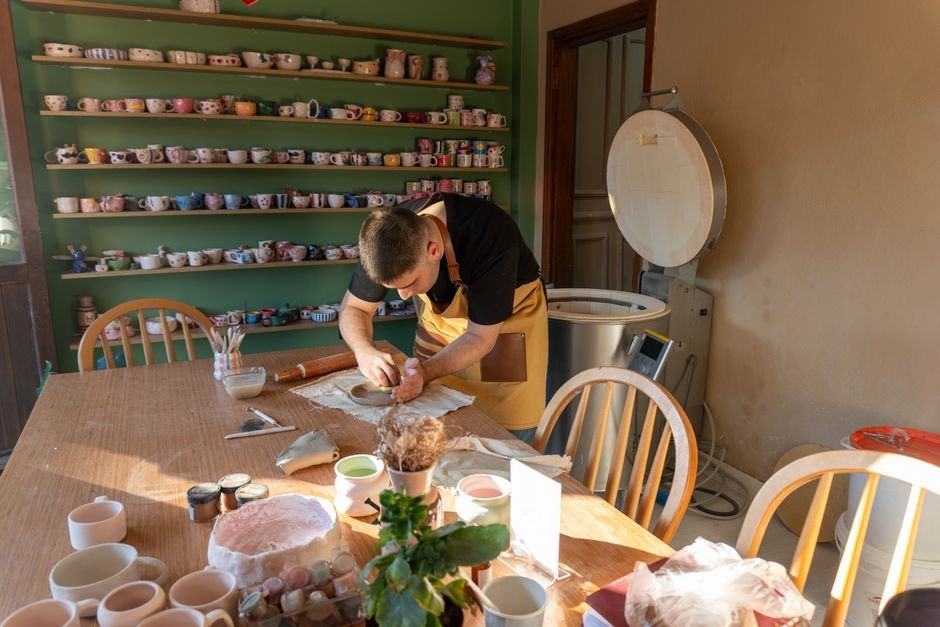
Hand building tables are large, sturdy work surfaces, often covered in canvas so clay doesn’t stick. This is where people pinch, coil, roll slabs, carve, and assemble pieces by hand. In many studios, these tables are also where classes gather for demonstrations.
The wedging table is a heavy, solid surface, sometimes made of plaster, concrete, or canvas covered board, used for kneading clay. Wedging removes air bubbles and evens out moisture, so it’s one of the first things you’ll do before throwing. Plaster tops help draw moisture out of soft clay. Our article on how pottery plaster is used in the studio explains why.
Nearby, you’ll often find a slab roller, which flattens clay into even sheets, and an extruder for making coils and handles. Shared tool racks hold rolling pins, cutters, ribs, and texture tools.
Clay storage is usually close by too. Bags of clay are kept sealed and out of direct sun, and a reclaim area collects scraps so they can be rehydrated and reused.
Hand building tables tend to be the most sociable part of the studio. Because nobody is tied to a spinning wheel, people chat, swap tips, and look at each other’s work as they go. For many beginners, this is where the studio first starts to feel like a community rather than just a room full of equipment.
The Glazing Area
The glazing area is where bisque fired pieces are coated with glaze before their final firing. You’ll typically see shelves of glaze buckets, each clearly labelled, along with test tiles showing what each glaze looks like after firing.
Many studios have space for dipping, where pieces are submerged in large buckets of glaze, as well as tables for brushing and pouring. Wax resist, sponges, brushes, and tongs are usually kept nearby.
The glazing area is deliberately kept cleaner than the clay areas. Stray clay or dust can contaminate glazes, so many studios ask people to wash their hands and use separate sponges here.
Safety matters in this space too. Some glaze materials shouldn’t be breathed in or swallowed, so studios usually avoid eating and drinking in the glazing area and ask people to wipe up spills promptly.
You’ll often find the studio’s glaze recipes or product sheets displayed here as well, along with notes about which glazes are suitable for food surfaces. Reading those before you glaze is a simple habit that saves disappointment later.
The Kiln Room
Kilns usually have a dedicated room or area of their own, and for good reason. They get extremely hot, the outside surfaces can burn on contact, and firings release heat and fumes that need to be vented away safely.
A kiln room typically includes ventilation, such as an extraction fan or kiln vent, plus clear space around each kiln and fire safe surfaces. Shelves nearby hold kiln furniture, including the shelves and posts used to stack work inside.
Access is usually limited. In many studios, only staff or trained members load and fire the kilns, which keeps firings consistent and protects everyone’s work. Our guide to the parts of a kiln explains the equipment.
Next to the kiln room, you’ll often find separate shelves for work waiting to be bisque fired, work waiting for a glaze firing, and finished pieces ready for pickup.
You might also notice a firing log or schedule on the wall. Studios use it to track which kiln was fired, to what cone, and when, which helps spot problems and plan the next loads. If you’re ever wondering when your piece will come out, that schedule is often the best clue.
What Competing Guides Leave Out About A Working Ceramic Studio Layout
Most descriptions of a working ceramic studio layout list the equipment but skip the unwritten rules that make a shared space work. Studio etiquette matters just as much as the layout. Cleaning your wheel and splash pan, returning tools, and wiping down tables after use are expected in almost every shared studio.
Drying shelves are another overlooked zone. Work in progress needs somewhere to firm up slowly, usually on labelled shelves, often with plastic covers. Respecting other people’s shelf space, and never moving or touching someone else’s drying work, is a big part of studio courtesy.
Then there’s dust and slurry. Dry clay dust contains fine silica, which isn’t something you want to breathe in regularly. Well run studios usually clean with damp sponges and mops rather than sweeping, which stirs up dust.
Clay slurry also needs managing. Clay shouldn’t go down ordinary drains, because it settles and causes blockages. Many studios use settling buckets or sink traps that catch the clay before the water drains away.
Finally, good studios label everything, from glaze buckets to shelves to reclaim bins. It might seem fussy, but clear labelling prevents mistakes and helps a busy, shared space run smoothly.
Where A New Member Fits Into A Working Ceramic Studio Layout
On your first visit, it’s completely normal to feel a bit unsure where to put things. Most studios give new members a short orientation, showing where to store clay, which shelves to use, and how to sign up for wheels or kiln loads.
Dress for mess. Clay and glaze get everywhere, so old clothes, closed shoes, and short or tied back nails help. Our guide on what to wear to a pottery class covers the details.
Ask questions. Experienced members are usually happy to explain where something lives or how a process works. Studios run on shared knowledge, and nobody expects you to know everything at the start.
Take your time learning the rhythm of the space. Within a few sessions, the zones will feel natural. Our workshops and classes are a gentle way in, our guide to a day in the life at Le Studio shows how the space works day to day, and members of our ceramic studio use our firing service for every kiln load.
Want to see a working ceramic studio for yourself? Visit Le Studio Art Space in Mordialloc and see our wheel area, hand building tables, glazing space, and kilns first hand before your first class.
Frequently Asked Questions
Why are kilns kept in a separate room?
Kilns get very hot and release heat and fumes during firing, so they need ventilation and clear space around them. A separate room keeps everyone safer and the rest of the studio more comfortable.
Is a pottery studio dusty and bad for your lungs?
Dry clay dust can be a concern, which is why well run studios clean with damp methods instead of sweeping. Good cleaning habits keep dust levels low.
Can I use any wheel or table in a shared studio?
It depends on the studio. Some use booking systems for wheels, while others work on a first come basis, so ask during your orientation.
What happens to the clay that goes down the sink?
Many studios use settling buckets or sink traps so clay doesn’t block drains. The settled clay can often be reclaimed.
Can I visit Le Studio Art Space before booking a class?
Yes, we’re happy for people to see the space before joining. Le Studio Art Space can show you around the studio and answer questions about classes and membership.
This article is provided for general educational purposes by Le Studio Art Space. Studio layouts, rules, and safety practices vary between studios.