The most common hand building mistakes beginners make are weak joins from skipping scoring and slip, working with clay that’s too wet or too dry, uneven wall thickness, and rushing the drying process. These lead to cracks, separated joins, slumping, and warping. The good news is that each one is easy to understand and, with a few habits, very fixable.
If your hand built pieces keep cracking, collapsing, or coming apart at the joins, you’re not alone. Almost everyone runs into the same small set of hand building mistakes beginners make, and they’re usually not a sign of lacking talent. They’re simply part of learning how clay behaves as it’s shaped, dried, and fired.
At Le Studio Art Space in Mordialloc, we troubleshoot these problems with members every week, often mid-project. This guide walks through the most common mistakes, why they happen, how to fix them before starting over, and how to keep your confidence while you learn.
Not Scoring And Slipping Joins Properly
Weak joins are probably the number one cause of hand building disappointment. When two pieces of clay are simply pressed together, they may look attached, but the surfaces haven’t truly bonded. As the clay dries and shrinks, the join pulls apart, leaving a crack or a handle that drops off in the kiln.
The fix is scoring and slipping. Scoring means roughing up both surfaces with a needle tool, fork, or serrated rib, creating grooves for the clay to grip. Slip is a creamy mix of clay and water brushed onto the scored areas, acting like glue. Press the pieces together firmly with a slight wiggle, then blend or smooth the seam.
Reinforcing joins helps too. Adding a thin coil into an inside corner and blending it in adds strength where slabs meet. For handles and attachments, blending clay from the attachment onto the body, rather than just smoothing the edge, creates a much stronger bond.
It’s also important that both pieces are at a similar moisture level. Joining soft clay to firmer clay is a common cause of cracks, since the two shrink at different rates as they dry. If one piece has firmed up, dampen it slightly or wait until the other catches up.
Working With Clay That Is The Wrong Consistency
Clay consistency affects everything. Clay that’s too wet is sticky, slumps easily, and struggles to hold a shape, particularly in taller forms. Clay that’s too dry cracks when bent, feels crumbly, and doesn’t join well.
For most hand building, you want clay that’s soft enough to shape without cracking but firm enough to stand up. If you squeeze a coil and the edges split, it’s too dry. If it leaves clay all over your hands and won’t hold its form, it’s too wet.
Slabs have their own timing. Soft slabs are great for curving and draping, but they’ll sag if you try to build a box with them. Leather hard slabs are ideal for straight walls and crisp edges but crack if you try to bend them. Matching consistency to the job solves many problems.
Wedging clay before you start helps even out moisture and removes air bubbles. Keeping work covered with plastic between sessions stops it from drying too quickly. Our guide to signs your clay is too wet or too dry goes into this in more detail.
Uneven Wall Thickness, A Classic Hand Building Mistake
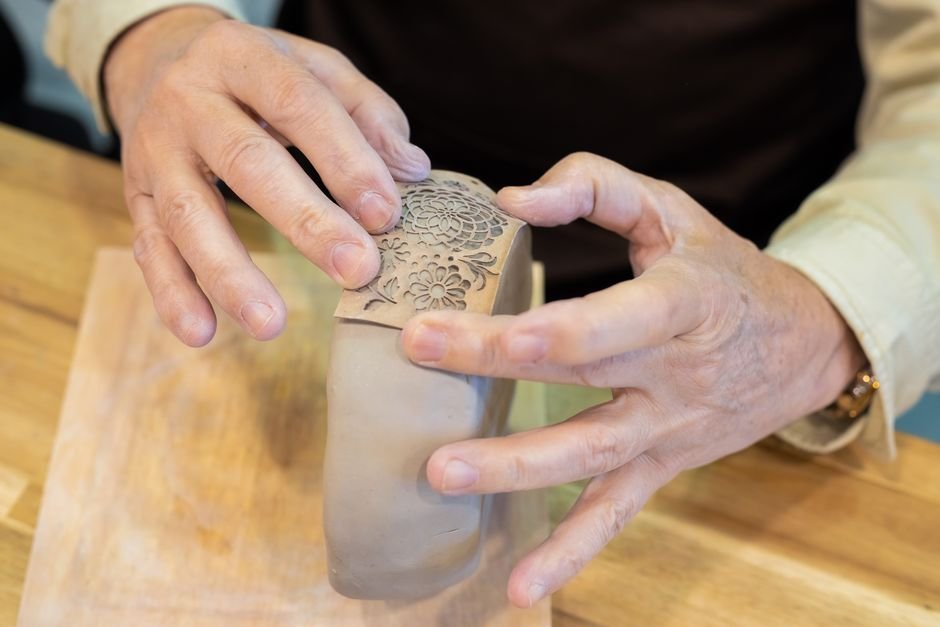
Uneven walls are another very common beginner issue. Thick areas dry more slowly than thin areas, and as the clay shrinks at different rates, stress builds up. That stress shows up as cracks, often at the point where thick meets thin, or as warping as the piece dries.
Pinch pots often end up with thick bases and thin rims. Coil pots can have lumpy walls where coils weren’t blended evenly. Slab pieces may have thin edges where the clay was stretched. In each case, the fix is paying attention to thickness as you build.
A good rule of thumb is to keep walls roughly the thickness of a pencil for small pieces, and fairly consistent throughout. Gently squeezing walls between your fingers, or checking with a needle tool pushed through a hidden area, can help you find thick spots.
Solid, chunky sections are a particular risk in the kiln. Very thick clay can trap moisture and crack or even burst during firing, so it’s best to hollow out solid forms and keep walls even. Our article on why pottery can explode in the kiln explains why.
Rushing The Drying Process
It’s natural to want to see your piece finished, but rushing drying causes more cracks than almost anything else. When clay dries too quickly, especially unevenly, the outer surfaces shrink faster than the inside, and cracks appear at rims, joins, and bases.
Common rushing habits include leaving pieces uncovered in warm or windy spots, using heaters or hair dryers too aggressively, and moving pieces to the next stage before they’re ready. Handles and thin edges are especially vulnerable because they dry faster than the body.
Slow, even drying is the fix. Cover pieces loosely with plastic for the first few days, then gradually uncover them. Wrapping handles and thin parts in a little extra plastic helps them keep pace with the body. Flipping pieces occasionally lets the base dry too.
Patience pays off in the kiln as well. Pieces that aren’t fully dry before firing can crack or blow apart. If a piece feels cool to the touch, there’s still moisture inside, so give it more time before it goes to the firing service.
What Competing Guides Leave Out
Most lists of mistakes assume you’ll just start again, but many problems can be fixed mid-project. Small cracks in soft or leather hard clay can often be repaired by scoring the crack lightly, working in a little slip or soft clay, and compressing it with a rib. The key is catching them early, before the clay dries further.
Fixing Hand Building Mistakes Before They Reach The Kiln
A slumping wall can sometimes be saved by letting the lower part firm up before continuing, or by supporting it temporarily with newspaper or a soft prop. A join that’s starting to separate can be reopened, rescored, reslipped, and pressed back together while it’s still leather hard.
Warped slabs or rims can often be gently eased back into shape while still soft, then dried more slowly under plastic. Once a piece is bone dry, repairs become much harder, so check your work regularly as it dries.
Sometimes the honest answer is that a piece can’t be saved, and that’s okay too. Clay that hasn’t been fired can be reclaimed by letting it dry completely, soaking it in water, and wedging it back into workable clay. Nothing is truly wasted, and many potters find that letting go of a flawed piece is easier once they know the clay itself gets a second life.
A shared studio environment helps a great deal here. Instructors and other members can spot problems early, like a join that looks weak or a rim drying too fast, and suggest fixes before it’s too late. In our ceramic studio, that kind of casual advice happens all the time and saves many pieces.
How To Build Confidence Despite Early Hand Building Mistakes
Every experienced potter has a history of cracked, collapsed, and lopsided pieces. Mistakes are how you learn what clay will and won’t do, and each one teaches you something you’ll use for years. It’s worth reminding yourself of that when a piece doesn’t survive.
Try to keep early projects small and simple. Smaller pieces are more forgiving, dry more evenly, and let you practise techniques without investing too much time. As your confidence grows, you can scale up gradually.
Keeping a simple record helps too. Note what went wrong and what you’ll try next time, whether that’s more scoring, slower drying, or thinner walls. Over time, you’ll notice fewer repeat mistakes and more successes.
Most importantly, learn with support. Our workshops and classes give you hands-on guidance, and our overview of the core hand building methods is a helpful refresher. In our experience, beginners who stick with it through the early mistakes usually find the craft becomes deeply rewarding.
Tired of cracks and collapsing pieces? Get hands-on guidance to avoid common mistakes during a class at Le Studio Art Space in Mordialloc, where our team can help you troubleshoot as you build.
Frequently Asked Questions
Why do my hand built pieces keep cracking?
The most common causes are weak joins, uneven wall thickness, and drying too quickly. Scoring and slipping joins, keeping walls even, and drying slowly under plastic usually help a lot.
Can I fix a crack in my clay before it’s fired?
Often you can if the clay is still soft or leather hard. Score the crack, add a little slip or soft clay, and compress it firmly, then dry the piece slowly.
Is it normal for my first pieces to fail?
Completely normal. Most beginners lose a few pieces while learning, and each one teaches something useful for the next project.
How long should I let my piece dry before firing?
It varies with size and thickness, but a week or more is common. The piece should feel room temperature, not cool, before it goes into the kiln.
Can someone check my work before it’s fired?
Yes, at Le Studio Art Space our team is happy to look over pieces for weak joins or drying issues before they go into the kiln.
This article is provided for general educational purposes by Le Studio Art Space. Clay behaviour varies with clay body, climate, and technique, so results can differ from piece to piece.