Getting started with GR Forms means picking a simple, shallow shape for your first attempt, rolling an even slab, and draping it gently over or into the form, which gives a first-timer a genuinely achievable path to a clean, symmetrical bowl.
Your first time using a GR Form can feel a little intimidating, especially if you’ve only ever hand built freehand up to this point. That hesitation is normal, and it fades quickly once you’ve actually tried one.
At Le Studio Art Space, beginner hand building sessions often introduce GR Forms early, since they give someone brand new to the craft a genuinely satisfying first result without demanding years of freehand skill first.
This article walks through choosing your first shape, prepping your slab properly, and working through your very first project step by step.
What A GR Form Actually Is
A GR Form is a reusable wood drape mold, cut and beveled from durable fiberboard, that a hand builder drapes or presses a rolled clay slab over or into, letting the clay hold that shape while it firms up.
If you’ve never seen one in person, picture a smooth, curved wooden shape, roughly bowl or plate sized, sitting on a work table waiting for a slab of clay to be laid over it.
Some forms are convex, called hump molds, where the clay drapes over the outside curve, while others are concave slump molds, where clay presses into an inner cavity, and beginners typically start with the simpler of the two for their very first attempt.
Unlike a plaster mold used for slip casting liquid clay, a GR Form works with a solid, rolled slab you shape by hand, so there’s no liquid pouring or plaster involved at any point.
Because the forms are so durable, the one you use for your first project will likely still be usable for genuinely thousands of future pieces, which is part of why studios keep a full set on hand.
Choosing A Simple Shape For Your First Attempt
A shallow, gently curved bowl form is genuinely the best starting point for a first attempt, since less dramatic curves are far more forgiving of small mistakes in slab thickness or draping technique.
Avoid reaching for a deep, steeply curved form right away, since those demand more careful, gradual smoothing to avoid stretching or thinning the clay unevenly as it settles into the shape.
A smaller form is also easier to manage on your first try than a large platter, simply because there’s less surface area to smooth evenly and fewer opportunities for air pockets to form underneath the slab.
If your studio has a few different shallow forms available, picking one with a simple, rounded profile rather than an asymmetrical or unusually shaped design keeps your first attempt as straightforward as possible.
It’s genuinely fine to ask an instructor which form they’d recommend for a first attempt. Most are happy to point a beginner toward the most forgiving option in the studio’s collection.
Don’t feel pressured to pick the most impressive looking form in the collection either. A plain, simple shape that lets you focus entirely on technique will teach you far more than an ambitious one that leaves you frustrated.
Preparing Your Slab Before Draping It
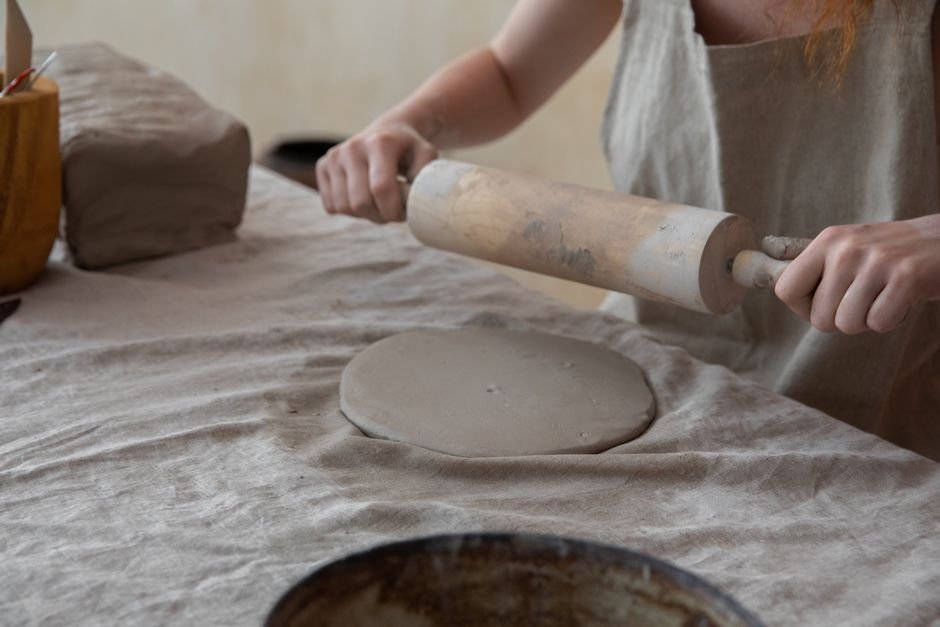
Roll your clay out to a consistent thickness, somewhere around a centimeter for a first attempt, since uneven thickness is genuinely the single most common cause of cracking once the slab is draped.
Use guide sticks or slats on either side of your clay while rolling if your studio has them, since they keep the rolling pin at a consistent height and make an even slab much easier to achieve as a beginner.
Check your clay’s consistency before rolling too. Clay that’s too dry cracks more easily during draping, while clay that’s too soft can stretch and thin unevenly under its own weight once it’s on the form.
Cut your rolled slab a little larger than the form itself, giving yourself enough excess to drape comfortably and trim away afterward, rather than cutting it exactly to size and risking coming up short.
Let your slab rest for a few minutes after rolling if it feels too soft to handle confidently, since a few minutes of firming up can make a real difference to how manageable the draping step feels.
Your First Project Step By Step
Lift your rolled slab carefully and lay it centered over your chosen form, working slowly rather than rushing, since a careful start makes the rest of the process noticeably smoother.
Gently press and smooth the clay from the center outward, easing it down against the form’s curve while checking regularly for any trapped air pockets forming underneath.
Smooth any wrinkles or folds as you go, working patiently rather than forcing the clay, since patience at this stage genuinely makes the difference between a clean result and a cracked or uneven one.
Once the slab is fully settled against the form, leave it to firm up until it holds its shape confidently on its own, checking gently every so often rather than on a fixed timer.
When it’s ready, carefully lift the piece off the form, trim the rim neatly, and finish the edge with a rib or sponge, and that’s genuinely your first completed GR Forms project done.
What Competing Guides Leave Out
Most beginner guides skip over what a first attempt actually tends to look like, and being honest, a first piece off a form often has a slightly uneven rim or a small wrinkle here and there, which is genuinely normal.
Uneven slab thickness is the beginner mistake that trips up more first attempts than anything else, and it’s rarely called out clearly enough in general guides, even though it’s usually the actual cause behind a cracked or lopsided result.
Working too quickly is another quiet culprit. Rushing the smoothing step tends to trap air pockets under the slab, which can show up later as a bulge or an uneven section once the piece firms up.
Few guides mention that it’s genuinely fine to release a piece early and gently reshape a small section if something looks off, rather than assuming the shape is locked in the moment it touches the form.
Realistic timing rarely gets covered either. A first attempt from rolling to a finished trimmed piece often takes a beginner noticeably longer than an experienced potter, and that’s a completely normal part of building the skill.
What To Try Next Once You Are Comfortable
Once a shallow bowl form feels comfortable, moving to a slightly deeper or larger form is a natural next step, giving you a chance to practice the same technique on a more demanding shape.
Trying a slump form after starting with a hump form, or vice versa, helps you build confidence with both draping directions, since the two techniques feel a little different in practice.
Making a small matching set, like two or three bowls off the same form, is a genuinely good way to practice consistency once your basic technique feels solid.
From there, larger platters or more dramatically curved forms give you room to keep building skill, and many hand builders find their confidence grows quickly once the first few pieces are behind them.
Combining forms with freehand touches, like adding a hand shaped foot or rim detail after releasing a piece from the form, is a natural way to start blending both techniques as your skills develop.

Ready to try your first GR Forms project? Join a beginner hand building session at Le Studio Art Space in Mordialloc and shape your first bowl with guidance.
Frequently Asked Questions
Is it normal for my first piece to look uneven?
Yes, genuinely. A slightly uneven rim or a small wrinkle on a first attempt is completely normal, and most beginners see their results improve noticeably by their second or third try.
What if my clay cracks while I’m draping it?
Cracking usually comes down to uneven slab thickness or clay that’s a bit too dry, so rolling a consistent slab and checking your clay’s moisture before starting genuinely helps prevent it.
Do I need any special skills before trying a GR Form?
Not really. Many beginners find a GR Form actually easier for a first symmetrical bowl than shaping one entirely freehand, which is part of why Le Studio Art Space introduces them early in beginner sessions.
How do I know when my piece is ready to come off the form?
Check gently every so often rather than on a fixed timer. Once the piece holds its shape confidently on its own without sagging, it’s genuinely ready to release.
What size form should a total beginner start with?
A small, shallow bowl form is the easiest starting point, since less surface area and a gentler curve make the whole draping and smoothing process more manageable for a first attempt.
This article is provided for general educational purposes by Le Studio Art Space and reflects publicly available product information and common studio practice.