Most pottery cracks come from uneven drying, trapped moisture in the kiln, or cooling too fast. An S-shaped crack in the base means the rim dried before the base, a piece that blew apart in the bisque still held water, and a sharp crack after the glaze firing usually means it cooled too quickly or the glaze didn’t fit the clay. When you noticed the crack tells you more than anything else.
Why Did My Pottery Crack? Pottery Fault Finder
Why did my pottery crack? It’s the question every potter asks, usually while holding two halves of a mug they were proud of. This fault finder works the way an experienced studio tech would: it asks when you noticed the problem and what it looks like, then points you to the most likely cause and the first thing to check.
It covers glaze faults too, from crawling and pinholes to crazing and runs, because they often get mixed up with cracks.
Most likely fault
Pieces exploding in the kiln
A piece blows apart during the firing, often scattering fragments over the work around it. It nearly always happens early in the bisque.
Safety: an explosion can throw sharp fragments and damage other people’s work and the kiln. Never fire work that might be damp, and never open a hot kiln to check on it.
Check this first
Check how dry the piece was and how thick it was. Moisture trapped in thick or enclosed clay is the usual cause.
Likely causes and how to prevent each
Water left in the clay turned to steam and expanded faster than it could escape. The trapped water, not trapped air, is what does the damage.
Prevent it: Only fire bone-dry work. A piece that feels cool against your cheek still holds water.
Source: Ceramic Arts Network, "Techno File: The Air Bubble Myth" (Ceramics Monthly).
Thick or solid sections (sculpture, heavy bases) were still damp inside.
Prevent it: Hollow out thick forms to an even wall, and give thick work days or weeks more to dry.
Source: ThePotteryWheel, "Why does pottery explode in the kiln".
The kiln heated too fast through the boiling point of water.
Prevent it: Candle the kiln: hold it below 100 °C for several hours, or ramp slowly through the early stage, so moisture leaves gently.
Source: ClayGeek, "5 ways to prevent explosions in your kiln".
An enclosed hollow form had no way for steam to escape.
Prevent it: Pierce a small hole into every closed space, such as a sealed bead, rattle or hollow sculpture.
Source: Ceramic Arts Network, "Techno File: The Air Bubble Myth" (Ceramics Monthly).
Full write-up: Pieces exploding in the kiln in the fault guide below.
This tool at a glance
- What it does
- Works out the most likely reason a piece cracked or a glaze failed, and what to change next time.
- Inputs
- The stage you noticed the fault (while drying, after the bisque, after the glaze firing, or days later or in use) and what it looks like.
- Method
- A two-step decision tree. Each stage has its own list of symptoms, and each symptom leads to one fault. The causes for every fault come from published troubleshooting sources, listed most common first.
- Outputs
- The fault’s name, what to check first, likely causes with how to prevent each, the source for every cause, and a safety note where one applies.
Pottery fault guide: causes, prevention and what to check first
Safety first. Safety: an explosion can throw sharp fragments and damage other people’s work and the kiln. Never fire work that might be damp, and never open a hot kiln to check on it. Food safety: crazed, leaking or porous ware can trap bacteria and may let glaze materials leach. Keep it for decorative use, and follow the glaze maker’s guidance on food surfaces. Dust safety: dry clay and glaze dust contain crystalline silica, which can cause serious lung disease. Sand or scrape only when damp, wet-clean surfaces, never dry sweep, and wear a P2 respirator around dry materials.
How to diagnose a pottery fault
- Note when you first saw it. Decide whether the fault appeared while the piece was drying, after the bisque, after the glaze firing, or days later in use. The stage narrows the causes more than anything else.
- Describe what it looks like. Look closely at the shape of the crack or the glaze surface. An S-shaped crack, beads of glaze, pinholes and a web of fine cracks each point to a different fault.
- Check the most likely cause first. Start with the check listed for that fault, such as how evenly the piece dried or what cone the kiln actually reached, before changing your clay or glaze.
- Change one thing and test. Fix the most likely cause, then make or fire a test piece before changing anything else, so you know what worked.
S-crack in the base
A curved or S-shaped crack across the middle of the base. It forms while the pot dries, even if you only notice it after the bisque. Usually noticed: while drying, after the bisque.
Check first: Look at how the piece dried. If the rim was dry while the base was still soft, uneven drying is almost certainly the cause.
- Cause: Uneven drying: the rim dried and shrank ahead of the thicker base, pulling the base apart. Prevent it: Dry slowly and evenly. Cover the rim loosely with plastic, and turn pieces upside down once the rim is firm enough. (Digitalfire, "S-crack" and "drying crack" glossary entries)
- Cause: Clay particles in the base were left loosely aligned because the base wasn’t compressed while throwing. Prevent it: Compress the base with a rib or your fingers after opening, and again before you pull the walls. (Ceramic Arts Network, "Crack Pots" (Pottery Making Illustrated))
- Cause: Water pooled in the bottom during throwing and softened the base. Prevent it: Sponge out standing water before you finish a piece. (ThePotteryWheel, "S cracks in pottery")
- Cause: The base is much thicker than the walls, so it dries and shrinks at a different rate. Prevent it: Trim the base to an even thickness, close to the wall thickness. (ThePotteryWheel, "S cracks in pottery")
Cracks at the rim or edges
Small cracks starting at the rim, the edge of a slab or a thin point, usually as the piece goes from leather hard to bone dry. Usually noticed: while drying, after the bisque.
Check first: Check whether the cracks are on the side facing a heater, a window or a draught. Edges in moving air dry first.
- Cause: Thin edges dried and shrank faster than the rest of the piece. Prevent it: Dry under loose plastic and keep pieces out of draughts, sun and heaters. Wax or cover thin edges if needed. (ThePotteryWheel, "Why pottery clay cracks when drying")
- Cause: The piece dried unevenly from one side. Prevent it: Turn pieces as they dry, or dry them in a damp box or on a slatted rack so air reaches every side. (Digitalfire, "S-crack" and "drying crack" glossary entries)
- Cause: Small cracks made while working (a split rim or a torn slab edge) opened up as the clay shrank. Prevent it: Compress rims with a chamois or sponge, and smooth over any small tears while the clay is soft. (ThePotteryWheel, "Why pottery clay cracks when drying")
Cracks at handles and joins
Cracks where a handle, spout, foot or slab seam meets the body. Usually noticed: while drying, after the bisque.
Check first: Ask whether the two pieces were at the same dryness when you joined them. A soft handle on a firm mug is the classic cause.
- Cause: The two parts had different moisture contents, so they shrank by different amounts. Prevent it: Join parts at the same leather-hard stage, and slow the drying of the whole piece afterwards. (Ceramic Arts Network, "Crack Pots" (Pottery Making Illustrated))
- Cause: The join wasn’t scored and slipped well enough to knit the clay together. Prevent it: Score both surfaces, use slip, press firmly and blend the seam. (ThePotteryWheel, "Why pottery clay cracks when drying")
- Cause: Thin attachments such as handles dried ahead of the body. Prevent it: Cover the handle with a strip of plastic for the first day or two of drying. (ThePotteryWheel, "Why pottery clay cracks when drying")
Pieces exploding in the kiln
A piece blows apart during the firing, often scattering fragments over the work around it. It nearly always happens early in the bisque. Usually noticed: after the bisque.
Safety: an explosion can throw sharp fragments and damage other people’s work and the kiln. Never fire work that might be damp, and never open a hot kiln to check on it.
Check first: Check how dry the piece was and how thick it was. Moisture trapped in thick or enclosed clay is the usual cause.
- Cause: Water left in the clay turned to steam and expanded faster than it could escape. The trapped water, not trapped air, is what does the damage. Prevent it: Only fire bone-dry work. A piece that feels cool against your cheek still holds water. (Ceramic Arts Network, "Techno File: The Air Bubble Myth" (Ceramics Monthly))
- Cause: Thick or solid sections (sculpture, heavy bases) were still damp inside. Prevent it: Hollow out thick forms to an even wall, and give thick work days or weeks more to dry. (ThePotteryWheel, "Why does pottery explode in the kiln")
- Cause: The kiln heated too fast through the boiling point of water. Prevent it: Candle the kiln: hold it below 100 °C for several hours, or ramp slowly through the early stage, so moisture leaves gently. (ClayGeek, "5 ways to prevent explosions in your kiln")
- Cause: An enclosed hollow form had no way for steam to escape. Prevent it: Pierce a small hole into every closed space, such as a sealed bead, rattle or hollow sculpture. (Ceramic Arts Network, "Techno File: The Air Bubble Myth" (Ceramics Monthly))
Glaze crawling
The molten glaze pulls back into beads or islands, leaving patches of bare clay. Usually noticed: after the glaze firing.
Check first: Look at the unfired glaze on the next piece. If it cracks as it dries, it is shrinking too much; if it was thick in the corners, application is the cause.
- Cause: The glaze shrank and cracked as it dried, often because it has a lot of raw clay or was applied too thickly. Prevent it: Apply a thinner coat, especially in inside corners, and use a glaze with the right specific gravity. (Digitalfire, "Crawling" troubleshooting page)
- Cause: Dust, oil or grease on the bisque stopped the glaze bonding. Prevent it: Wipe bisque with a damp sponge before glazing, and handle it with clean, dry hands. (Digitalfire, "Crawling" troubleshooting page)
- Cause: A second layer re-wet the first and lifted it off the bisque. Prevent it: Let each coat dry before the next, and keep layered coats thin. (Digitalfire, "Crawling" troubleshooting page)
- Cause: The ware was still damp when it went into the kiln. Prevent it: Let glazed work dry fully, usually overnight, before firing. (Digitalfire, "Crawling" troubleshooting page)
Pinholes and pits in the glaze
Small holes or craters in the fired glaze surface that go down towards the clay. Usually noticed: after the glaze firing.
Dust safety: dry clay and glaze dust contain crystalline silica, which can cause serious lung disease. Sand or scrape only when damp, wet-clean surfaces, never dry sweep, and wear a P2 respirator around dry materials.
Check first: Check the bisque firing and the glaze firing schedule first: an underfired bisque or a fast firing with no hold are the usual suspects.
- Cause: Gases from the clay (from carbon, sulfur or carbonates) bubbled through the glaze as it melted. Prevent it: Bisque fully in a well-ventilated kiln, and slow the glaze firing near the top. (Digitalfire, "Glaze pinholes, pitting" troubleshooting page)
- Cause: The glaze was fired too fast and had no time at the top to heal over the bubbles. Prevent it: Add a hold at peak temperature, or use a drop-and-hold schedule, and cool more slowly. (Digitalfire, "Glaze pinholes, pitting" troubleshooting page)
- Cause: The clay body was underfired for its rating, so it stayed open and gassy. Prevent it: Fire the clay to the cone it is rated for. (Digitalfire, "Glaze pinholes, pitting" troubleshooting page)
- Cause: A rough or open bisque surface (coarse grog, scratchy trimming) trapped air under the glaze. Prevent it: Smooth surfaces at leather hard, and apply glaze evenly at the right thickness. (Digitalfire, "Glaze pinholes, pitting" troubleshooting page)
Crazing
A network of fine cracks in the glaze, either straight from the kiln or appearing weeks later. Usually noticed: after the glaze firing, days later or in use.
Food safety: crazed, leaking or porous ware can trap bacteria and may let glaze materials leach. Keep it for decorative use, and follow the glaze maker’s guidance on food surfaces.
Check first: Check whether this glaze was made for this clay. Crazing almost always means the glaze shrinks more than the clay on cooling.
- Cause: The glaze has a higher thermal expansion than the clay, so it is stretched as it cools and cracks. Prevent it: Use a glaze tested on this clay body, or one adjusted to lower its expansion. Slow cooling only delays crazing; it doesn’t fix it. (Digitalfire, "Glaze crazing" troubleshooting page)
- Cause: The clay body was underfired and porous, so it absorbs moisture and expands over time (delayed crazing). Prevent it: Fire the clay to its full rated cone so it becomes dense. (Digitalfire, "Glaze crazing" troubleshooting page)
- Cause: The glaze was applied very thickly. Prevent it: Apply glaze at the thickness the maker recommends. (Digitalfire, "Glaze crazing" troubleshooting page)
- Cause: The piece was heated or cooled quickly in use, which revealed a poor fit. Prevent it: Test glaze fit with a boiling water and ice water test before using a combination on functional ware. (Digitalfire, "Glaze crazing" troubleshooting page)
Shivering (glaze flaking off)
Slivers of glaze flake away from rims, handles and edges. It is the opposite of crazing. Usually noticed: after the glaze firing, days later or in use.
Safety: glaze flakes and glaze drips on shelves can be razor sharp. Wear safety glasses and gloves when grinding, and don’t use ware that is shedding glaze.
Check first: Check the edges and rims of other pieces with the same glaze, and stop using any piece that is shedding flakes.
- Cause: The glaze has a much lower thermal expansion than the clay, so it is squeezed too hard as it cools and pops off at edges. Prevent it: Use a glaze that fits the clay, or a clay that fits the glaze; the fit is adjusted the same way as for crazing, in the other direction. (Digitalfire, "Glaze shivering" entry)
- Cause: Sharp edges concentrate the stress. Prevent it: Round over rims and edges so the glaze isn’t stretched over a knife edge. (Digitalfire, "Glaze shivering" entry)
Dunting (cracks from heating or cooling)
A clean, sharp crack, often running right through the wall, caused by stress while the kiln heats or cools. Usually noticed: after the bisque, after the glaze firing, days later or in use.
Check first: Look at the edges of the crack. Sharp edges with glaze not rounded over them mean it cracked while cooling; rounded glaze means it cracked on the way up.
- Cause: The kiln cooled too fast through quartz inversion, around 573 °C, where silica changes volume suddenly. Prevent it: Slow heating and cooling through about 600 to 500 °C, and don’t open the kiln early. (Digitalfire, "Dunting" glossary entry)
- Cause: Uneven thickness, so thick and thin parts passed through the inversion at different times. Prevent it: Keep walls and bases an even thickness, and avoid heavy bases under thin walls. (Digitalfire, "Dunting" glossary entry)
- Cause: Uneven heating, from pieces close to the elements or sitting on a thick shelf that holds heat. Prevent it: Leave space around pieces and away from elements, especially large or wide forms. (Digitalfire, "Dunting" glossary entry)
- Cause: A poorly fitted glaze added stress, especially when it is thick on one side only. Prevent it: Glaze inside and out evenly, and use glazes that fit the clay. (Digitalfire, "Dunting" glossary entry)
Warping and slumping
Rims go oval, plates dish down, or tall forms lean or slump, either while drying or in the kiln. Usually noticed: while drying, after the glaze firing.
Check first: Check the witness cone or the firing record. A kiln that ran hotter than the clay’s rating is the most common kiln cause.
- Cause: Overfiring: the clay softened close to its melting point, often because the controller took it hotter than assumed. Prevent it: Use witness cones to see what the kiln really reached, and fire the clay to its rating. (Digitalfire, "Warping" troubleshooting page)
- Cause: The clay body is prone to it. Porcelain warps most because it contains more feldspar. Prevent it: Use thicker walls and lower, wider forms in porcelain, or a less vitreous body. (Digitalfire, "Warping" troubleshooting page)
- Cause: Uneven walls, or one side close to an element, heated and shrank unevenly. Prevent it: Throw even walls, and keep pieces away from elements. (Ceramic Arts Daily community forum threads on warping and leaking)
- Cause: The piece dried unevenly or was handled when soft, and the kiln brought back the distortion (clay memory). Prevent it: Dry flat pieces slowly under weight or plastic, and lift soft work carefully. (Digitalfire, "Warping" troubleshooting page)
Glaze running onto the shelf
The glaze ran down the piece and glued it to the kiln shelf or pooled at the foot. Usually noticed: after the glaze firing.
Safety: glaze flakes and glaze drips on shelves can be razor sharp. Wear safety glasses and gloves when grinding, and don’t use ware that is shedding glaze.
Check first: Check how thick the glaze was near the foot and whether the kiln fired hotter than the glaze is rated for.
- Cause: The glaze was applied too thickly, especially near the bottom. Prevent it: Apply thinner coats and keep glaze off the bottom 5 to 10 mm of the piece. (Digitalfire, "Runny ceramic glazes" troubleshooting page)
- Cause: The firing went hotter than the glaze is meant for, or a fluid glaze was used on a vertical form. Prevent it: Fire to the glaze’s cone, and use a waste slab or cookie under runny glazes. (Digitalfire, "Runny ceramic glazes" troubleshooting page)
- Cause: Two glazes were layered and together became much more fluid. Prevent it: Test layered combinations on a tile with a catch tray first. (Digitalfire, "Runny ceramic glazes" troubleshooting page)
Leaking or weeping pots
Water seeps through the clay, leaving damp rings on the table or a darkened base. Usually noticed: days later or in use.
Food safety: crazed, leaking or porous ware can trap bacteria and may let glaze materials leach. Keep it for decorative use, and follow the glaze maker’s guidance on food surfaces.
Check first: Check the clay’s rated cone against the cone the kiln actually fired to. A high-fire clay fired low is the most common cause.
- Cause: The clay body was underfired, so it never became dense enough to hold water. Prevent it: Fire the clay to its full rated cone. Clay fired lower than its rating stays porous. (Digitalfire, "Leaking of fired ceramics" troubleshooting page)
- Cause: Crazing let water through the glaze into a porous body. Prevent it: Use a glaze that fits the clay without crazing (see crazing). (Digitalfire, "Leaking of fired ceramics" troubleshooting page)
- Cause: An unglazed foot or base on a porous clay wicked water through. Prevent it: Choose a denser clay for tableware, or glaze the inside fully and fire to maturity. (Ceramic Arts Daily community forum threads on warping and leaking)
Cracks in the oven, microwave or with hot liquid
A piece that was fine in the kiln cracks when it meets sudden heat or cold in use. Usually noticed: days later or in use.
Food safety: crazed, leaking or porous ware can trap bacteria and may let glaze materials leach. Keep it for decorative use, and follow the glaze maker’s guidance on food surfaces.
Check first: Think about what happened just before it cracked: a cold dish into a hot oven, or a porous mug in the microwave.
- Cause: A sudden temperature change stressed the brittle ceramic, for example a cold casserole into a hot oven. Prevent it: Put ovenware into a cold oven and let it heat up with it, and avoid sudden swings from hot to cold. (Digitalfire, "Thermal shock" and "Microwave safe" glossary entries)
- Cause: A porous body absorbed water through an unglazed foot or crazing, and the microwave turned it to steam. Prevent it: Use dense, well-fired clay for microwave use, and don’t microwave porous or crazed ware. (Digitalfire, "Thermal shock" and "Microwave safe" glossary entries)
- Cause: A poor glaze fit left the glaze in too much tension or compression. Prevent it: Test glaze fit before making functional ware, as for crazing and shivering. (Digitalfire, "Thermal shock" and "Microwave safe" glossary entries)
How the pottery fault finder works
The fault finder is a two-step decision tree. First you choose the stage: while drying, after the bisque, after the glaze firing, or days later and in use. Then you pick the symptom from a short list for that stage, and the tool shows the matching fault.
The stage matters because each kind of stress happens at a different time. Drying stresses come from shrinkage as water leaves the clay, bisque failures from water turning to steam, glaze firing faults from the melt and the cooling, and later faults from how the glaze and clay behave in use. Choosing the stage first rules out most of the possible causes before you even look closely.
For every fault, the causes are listed most common first, each with how to prevent it and the published source it comes from. We drew them mainly from Digitalfire’s troubleshooting library and Ceramic Arts Network, which are the references most studio technicians reach for. The guide below the tool has the full write-up for every fault, so you can read around the answer.
Why did my pottery crack while drying?
Pottery cracks while drying because different parts of the piece shrink at different times. Clay shrinks as water leaves it, so any part that dries ahead of the rest pulls on the wetter clay around it.
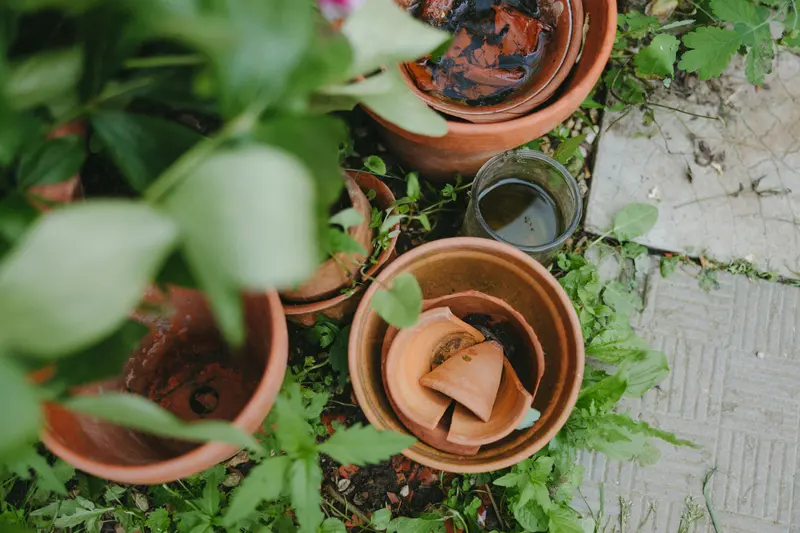
The classic example is the S-crack, a curved crack across the base. Digitalfire calls it the signature of uneven drying: the rim dries and shrinks first, the base is still soft, and the base tears. Ceramic Arts Network adds that the crack is already there in the dry clay, even if you only see it after the bisque, which is why bisque gets blamed for a lot of drying cracks.
Cracks at handles and joins work the same way. A soft handle on a firm mug shrinks more than the mug as it dries, so the join pulls apart. Joining parts at the same leather-hard stage, scoring and slipping well, and drying slowly under loose plastic prevents most of them. If you’re new to the wheel, compressing the base with a rib after opening is the single habit that stops most S-cracks.
Why did my pottery crack or explode in the kiln?
In the bisque, a piece that cracks or explodes almost always held moisture. Water in the clay turns to steam above 100 °C, expands enormously, and if it can’t escape fast enough it splits or shatters the piece.
Ceramic Arts Network makes an interesting point here: the old advice about air bubbles is mostly a myth. A small air pocket doesn’t cause an explosion by itself; what it does is trap moisture and slow drying. Thick sculptures, solid bases and sealed hollow forms are the usual victims. The fix is patience: dry work until it no longer feels cool against your cheek, hollow out thick forms, pierce enclosed spaces, and fire slowly through the early stage. Our article on why pottery can explode in the kiln goes into more detail.
Cracks that appear after the glaze firing are a different story. A clean, sharp crack running through the wall is usually dunting, caused by cooling too quickly through quartz inversion near 573 °C, or by thick and thin parts passing through it at different times. A crack with glaze rounded over its edges opened on the way up, while the glaze was still able to flow.
Glaze faults that look like cracks
Not every line in a glaze is a crack in the pot. Crazing is a web of fine cracks in the glaze only, caused by the glaze shrinking more than the clay as it cools. Shivering is the opposite: the glaze is squeezed too hard and flakes off at rims and edges.
Both are about glaze fit, the match between how much the glaze and the clay expand and contract. Digitalfire is clear that slow cooling only delays crazing, and that the real fix is a glaze that suits the clay body. Crazing also matters for safety on tableware, because the cracks can harbour bacteria and let water reach a porous body.
Crawling, pinholing and running are melt problems rather than cracks. Crawling leaves bare patches where the glaze pulled back into beads, usually from thick application or dusty bisque. Pinholes come from gas bubbling up through the melt. Runs come from thick glaze near the foot or a firing hotter than the glaze is rated for. Our guide to why glaze crawls, pinholes and runs has photos of each.
What to check first when a piece fails
Check the simple things before you change your clay or glaze. Most faults trace back to drying, firing temperature or application rather than to the materials.
Start with drying: was the piece bone dry and evenly dried? Then check the firing: what cone did the kiln actually reach, and was the clay rated for it? A witness cone tells you far more than the controller’s display, and our pyrometric cone chart converts cones to temperatures. Then look at application: was the glaze thick, layered, or near the foot?
Change one thing at a time and fire a test piece, so you know what fixed it. If you fire with a studio, tell the technician what you saw. At our kiln firing service in Mordialloc we’d always rather hear about a fault than have it repeat across a whole kiln load.
Safety: explosions, food safety and dust
Three faults carry real safety risks, so treat them seriously. Explosions throw sharp fragments, crazed or leaking tableware can trap bacteria, and sanding or sweeping dry clay releases silica dust.
Never open a hot kiln to look at work, and never fire pieces that might be damp. Keep crazed, leaking or shivering ware for decorative use rather than food, and follow the glaze maker’s guidance on food surfaces. Clean up clay and glaze dust with a damp sponge or mop rather than a broom, sand only when the clay is damp, and wear a P2 respirator when handling dry materials, as WorkSafe Victoria recommends for crystalline silica.
Frequently asked questions
Can I fix a cracked pot, or is it ruined?
A crack in dry, unfired clay can sometimes be repaired with paper clay or a commercial repair product, but it often reopens in the kiln. A crack in fired work is permanent, so most potters keep it as a lesson and use the fault finder to stop it happening again.
Was it my fault or the kiln’s?
Usually it’s the drying, not the kiln, especially for S-cracks and cracks at joins. Kiln causes are more likely when a fault appears across many pieces in one load, such as dunting from fast cooling or warping from overfiring.
My mug only cracked after a few weeks. Why?
Delayed cracks and crazing usually come from a glaze that doesn’t quite fit the clay, or from thermal shock in use, like hot water into a cold mug or a microwave heating a porous body. Choose the “days later or in use” stage in the tool to see the likely causes.
Is a crazed mug safe to drink from?
Glaze makers generally advise against using crazed glazes on food surfaces, because the cracks can harbour bacteria and let liquid reach the clay. Keep crazed pieces for decorative use, and test glaze and clay together before making tableware.
Can I bring a faulty piece to Le Studio Art Space?
Yes. The potters at Le Studio Art Space in Mordialloc are happy to look at a piece and talk through what might have happened, and our firing service can advise on drying and firing before your next load.
Why doesn’t the tool give me one definite answer?
Because many faults have more than one cause, and only you know how the piece was made, dried and fired. The tool lists the most likely causes first and tells you what to check first, so you can rule them out one at a time.
Sources and method
Every cause in the tool and guide names its source. The main references are Digitalfire’s troubleshooting and glossary library (S-crack, drying crack, crawling, glaze pinholes and pitting, glaze crazing, shivering, dunting, warping, runny glazes, leaking of fired ceramics, thermal shock and microwave safety), Ceramic Arts Network’s “Crack Pots” (Pottery Making Illustrated) and “Techno File: The Air Bubble Myth” (Ceramics Monthly), ThePotteryWheel’s guides to S-cracks, drying cracks and kiln explosions, ClayGeek’s guide to preventing kiln explosions, and Ceramic Arts Daily community forum threads on warping and leaking. Silica dust guidance is from WorkSafe Victoria and SafeWork NSW.
The grouping of faults by stage and the “check first” advice are our own studio summary of those sources. The quartz inversion figure (about 573 °C) is from Digitalfire’s dunting entry.
Figures last checked .
Use this tool on your site
You’re welcome to embed the pottery fault finder on your own site, studio page or class notes. Copy the code below. Please keep the credit link, it’s how other potters find the full version.
Cite this tool
Le Studio Art Space (2026). Pottery Fault Finder. The Potter’s Bench. https://lestudioartspace.com/potters-bench/pottery-fault-finder/ (accessed 28 October 2026).
This pottery fault finder from Le Studio Art Space is general educational content. It suggests likely causes from published troubleshooting guides; it can’t see your piece, and many faults have more than one cause. Always follow the clay and glaze manufacturer’s data, and for glaze and food safety decisions follow the manufacturer’s guidance and local regulations.