Pottery glazes change dramatically in the kiln because raw glaze is essentially a suspension of powdered minerals in water, which only becomes a smooth, glassy, often completely different-looking surface once heat melts and fuses those minerals together during firing. What goes on the pot and what comes out afterward can look almost unrelated.
Nothing quite prepares a new potter for the moment they open the kiln after a first glaze firing and see a completely different colour and surface than what they carefully brushed on the day before. At Le Studio Art Space, this is one of the most common surprises members experience in their first few sessions, and it’s genuinely one of the more magical parts of learning to work with glaze.
Understanding what’s actually happening chemically and visually between the raw glaze and the fired result takes away some of the confusion, and helps set realistic expectations for anyone picking up a glaze brush for the first time.
What Raw Glaze Actually Looks Like Before Firing
Unfired glaze is almost always chalky, flat, and matte, regardless of what colour it will eventually become once fired. This is because the pigments and glass-forming minerals suspended in the liquid haven’t melted or bonded together yet, so there’s no glassy surface to reflect light the way a fired glaze does.
The colour of raw glaze is also frequently a poor indicator of the fired result. Many glazes look pale pink, grey, or an unremarkable beige straight out of the bottle, while producing a rich blue, deep brown, or vivid green once fired, since the colourants inside often only develop their true colour under heat, sometimes shifting through several intermediate shades along the way as the kiln continues climbing toward its final temperature.
This mismatch is exactly why experienced potters rely on a manufacturer’s fired glaze chip or test tile rather than judging a glaze by its appearance in the jar, and it’s a habit well worth building early rather than guessing based on the raw colour alone.
Texture before firing is deceptive too. A raw glaze coat can feel gritty or powdery to the touch, giving no real hint of whether the fired surface will end up glass smooth, subtly textured, or genuinely rough, since that quality only emerges once the minerals actually melt together in the kiln, well after the piece has already left the glazing table and gone in to be fired.
What Happens As The Kiln Heats Up
As the kiln climbs in temperature, the glaze goes through several distinct stages, starting with the burn-off of any remaining water and organic binders that helped the raw glaze stick to the pot during application.
Further into the firing, individual mineral particles begin to soften and eventually melt together in a process called vitrification, essentially turning the powdery coating into a thin layer of molten glass sitting on the surface of the clay body, a transformation that happens gradually rather than all at once as the kiln continues to climb toward its target temperature.
As the kiln continues toward its target cone, that molten glass layer smooths and flows slightly, filling in tiny surface irregularities and settling into the glossy, semi-glossy, or matte finish the specific glaze recipe was designed to produce once fully matured.

Why Colour Can Shift Dramatically During Firing
Many glaze colourants are metal oxides, and metal oxides frequently produce completely different colours depending on the exact chemical environment they’re melted within, which is part of why the same colourant can look different across two different glaze recipes.
Firing atmosphere plays a genuine role too, particularly in gas or wood kilns where oxidation or reduction conditions can push the same base glaze toward noticeably different final colours, though most home and studio electric kilns fire in a consistent oxidation atmosphere.
Peak temperature also affects colour development directly, since some colourants need to reach a specific heat threshold to fully develop, and an underfired piece can come out visibly duller or less saturated than the same glaze fired correctly to its intended cone.
Layering glazes adds another genuine variable to colour development, since two glazes applied on top of each other can react chemically during firing in ways that produce a result neither glaze would create on its own, which is exactly why testing layered combinations matters as much as testing single glazes.
How Cooling Speed Affects The Final Look
Cooling speed genuinely matters as much as the heating side of a firing. Fast cooling tends to lock in glossier, more vitreous surfaces, while slow, controlled cooling gives certain glazes time to develop matte or crystalline textures that wouldn’t otherwise appear.
Some glazes are specifically formulated to react to a particular cooling profile, which is why two potters using the exact same glaze recipe but different kiln cooling schedules can end up with genuinely different finishes on their pieces.
This is one of the less visible variables in glaze firing, since it happens after the kiln has already reached peak temperature, but it can be just as influential on the final result as the glaze recipe itself.
A kiln with a programmable controller can be set to a specific slow-cool schedule deliberately, giving a potter genuine creative control over this stage rather than leaving it entirely to whatever the kiln happens to do naturally as it powers down and loses heat.
What Competing Guides Leave Out
Why test tiles matter rarely gets explained in enough practical depth. A small fired test tile lets a potter see a glaze’s true colour, texture, and behaviour on the exact clay body and firing schedule they’ll actually use, well before committing that same glaze to a larger, more time-consuming piece.
How studio kiln placement affects the outcome of the same glaze is another gap worth naming honestly. Heat distribution inside a kiln is rarely perfectly even, so a glaze fired near an element can look subtly different from the same glaze fired in a cooler spot on a different shelf, even within a single load.
Shared studio kilns add another layer of real-world variation that generic guides tend to skip, since a piece’s position relative to other work, shelf height, and the specific firing schedule chosen for that particular load can all shift results slightly from one firing to the next.
None of this means glaze results are hopelessly random. It means treating a glaze recipe as one part of a larger system that includes the kiln, the load, the clay body, and the cooling schedule, rather than expecting a single bottle label to guarantee an identical result every single time.
What To Expect The First Time You Glaze Fire
It’s genuinely normal for a first glaze firing to produce some surprises, whether that’s a colour more vivid or more muted than expected, or a texture slightly different from what the label description suggested it would be.
Many potters find that keeping a simple record of which glaze, thickness, and clay body combination produced which result helps enormously in building an accurate mental picture over time, rather than relying on memory alone after several firings.
Treating the first several glaze firings as genuine learning experiences, rather than expecting perfect predictability right away, sets a far more realistic and encouraging tone for anyone just starting to work seriously with glaze.
Asking questions along the way genuinely speeds up the learning curve too. Talking through an unexpected result with more experienced potters or studio staff, rather than just guessing at the cause, is exactly the kind of everyday exchange a community studio makes possible.
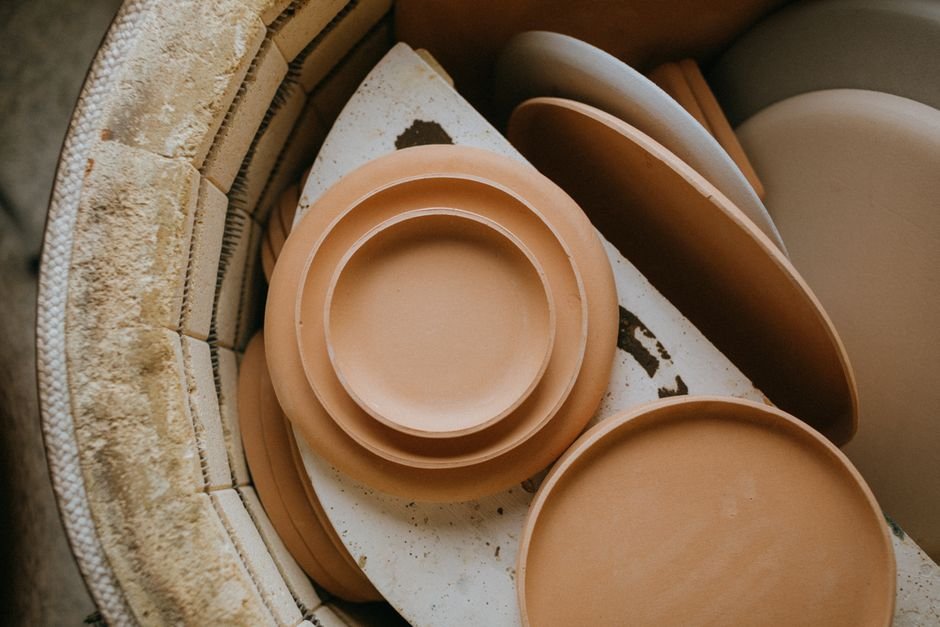
Want to see this transformation firsthand? Join a glazing class at Le Studio Art Space’s ceramic studio in Mordialloc and watch raw glaze become something else entirely.
Frequently Asked Questions
Is it normal for my glaze to look nothing like the colour in the jar?
Yes, this is completely normal and expected. Raw glaze colour is a poor predictor of the fired result, since the true colour only develops once the glaze melts and matures during firing. Always trust a fired test tile over the jar colour, especially the first time you try a new glaze.
Why did my glaze come out duller than the sample piece at the studio?
This can happen for several reasons, including underfiring, thin application, or kiln position. In our experience at Le Studio Art Space, comparing notes with staff about the exact firing schedule used often helps identify the cause.
Can two people use the same glaze and get different results?
Yes, genuinely. Application thickness, clay body, kiln position, and cooling speed can all shift the final look, even with the exact same glaze recipe used by two different potters in the same studio.
Should I be worried if my glaze looks completely different after firing?
Not necessarily. A dramatic transformation is expected and usually a good sign the glaze has matured properly. It’s only worth investigating further if the surface looks unfinished, overly rough, or the colour seems far outside the expected range.
How long does it actually take to predict glaze results reliably?
Most potters find it takes several firings with the same glaze and clay combination before results start feeling predictable. Keeping simple notes on each firing speeds up that learning process considerably.
This article is provided for general educational purposes by Le Studio Art Space and reflects common studio practice. Actual glaze results vary by kiln, glaze, and clay body.