Ready to paint ceramics are pieces that have already been shaped and bisque fired once, leaving them hard, porous, and ready to soak up paint before a second firing locks the colour in permanently. Understanding how ready to paint ceramics work helps you get better results from your very first session, whether you’re painting a simple mug or a more detailed sculpture.
Walking into a studio for the first time and being handed a ready to paint ceramic piece can feel a little mysterious if nobody has explained what’s actually going on with it. At Le Studio Art Space, this is one of the first things a new visitor asks about, usually right after they pick up a mug or a small animal figure and notice how chalky and porous it feels compared to a finished piece on a shelf. The short version is that the piece has already been through part of its journey, and understanding that journey makes the painting part a lot more enjoyable.
Ready to paint ceramics sit in an in-between stage of the pottery process, past the raw clay stage but before the final glaze firing that most people picture when they think of finished pottery. That in-between stage is exactly what makes them so approachable for a first-time visitor, since someone else has already handled the shaping and the first firing.
Once you understand that basic sequence, the whole experience of a paint-your-own session makes a lot more sense, from why the piece feels the way it does in your hands to why the colours look so different before and after the final firing.
What A Ready To Paint Ceramic Piece Actually Is
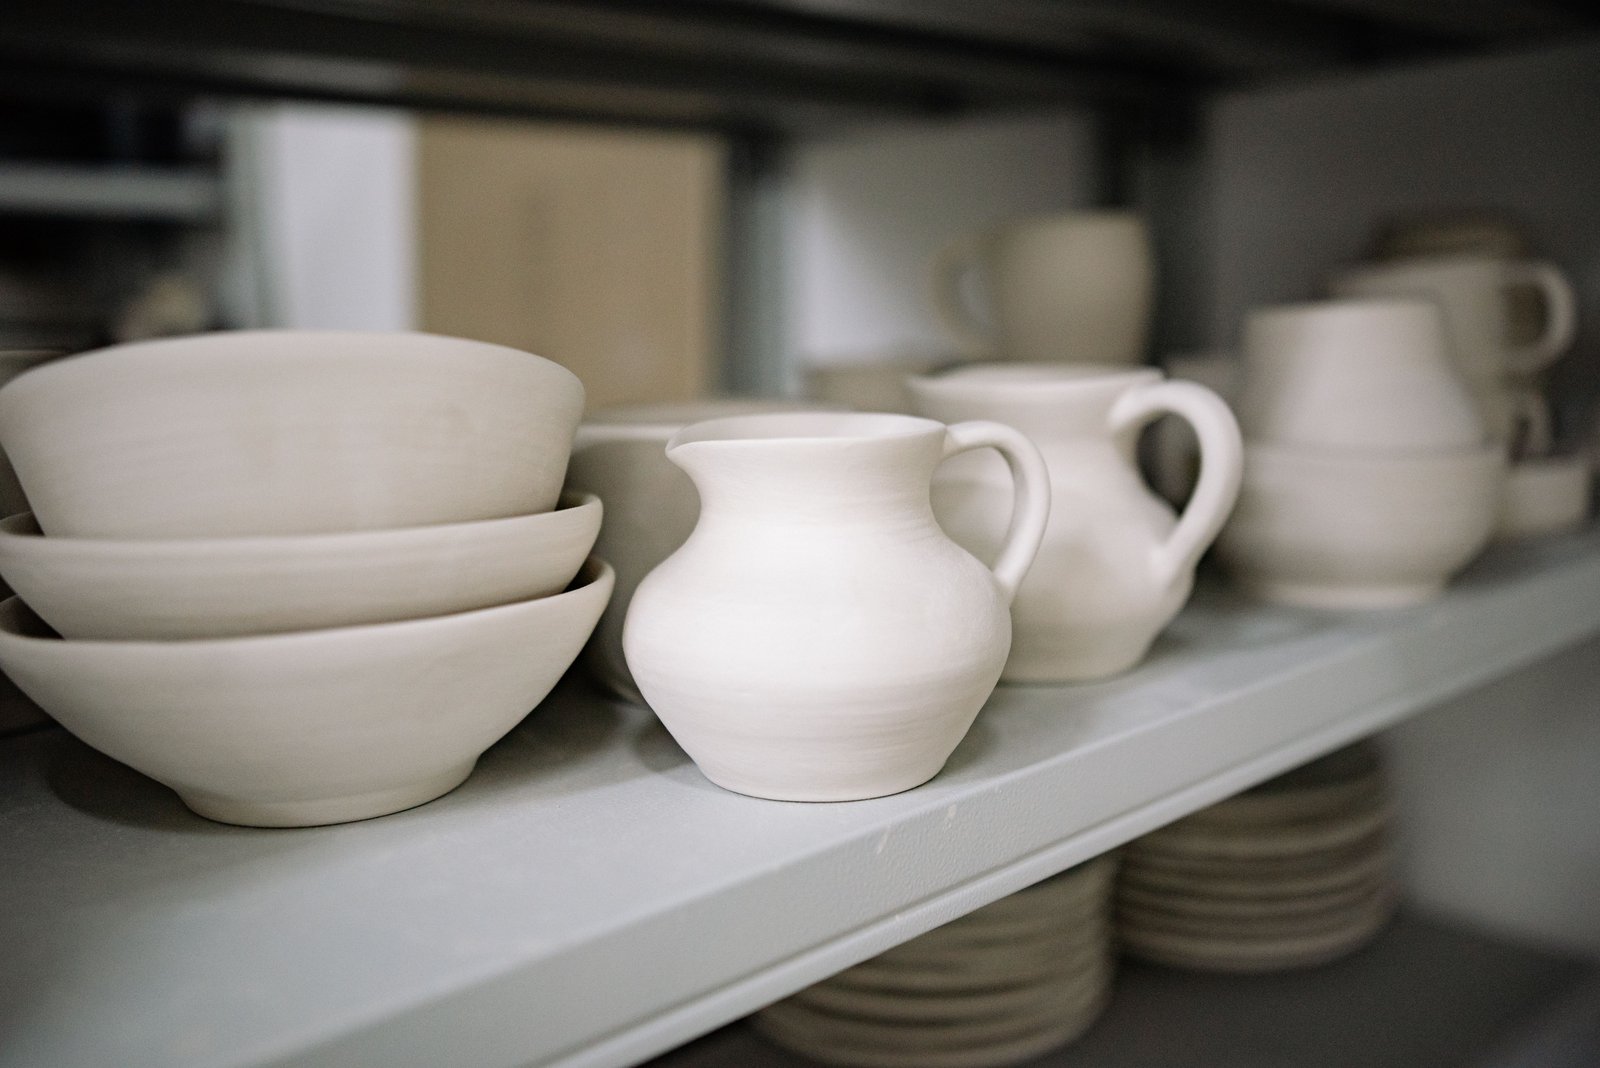
A ready to paint ceramic piece is technically called bisqueware, meaning clay that has been shaped, dried, and fired once in a kiln at a relatively low temperature. That first firing burns away the moisture and organic material in the clay and hardens it into a stable, permanent form that can no longer be reshaped or dissolved back into wet clay.
Before that first firing, the piece exists as greenware, which is soft, fragile, and easily damaged. Bisque firing changes all of that, turning the clay into something durable enough to handle, paint, and carry around a studio without much risk of it crumbling.
The surface of bisqueware is porous rather than smooth and glassy, which is actually the whole point. That porous texture is what lets paint and glaze soak into the surface rather than just sitting on top and sliding off.
Most studios, including Le Studio Art Space, keep a range of pre-made bisqueware on hand specifically so visitors can skip the wheel throwing or hand building stage and go straight to the decorating part of the process, which is a big part of what makes a paint-your-own session so approachable for beginners.
Why These Pieces Are Already Fired Once
The reason ready to paint pieces arrive pre-fired comes down to both practicality and durability. Firing clay for the first time takes real kiln time and careful temperature control, and doing that step in advance means a visitor can walk in and start painting the same day rather than waiting weeks for a piece to dry and fire first.
Bisque firing also makes the piece sturdy enough to survive normal handling during a decorating session. A greenware piece would be far too fragile to pick up, turn over, and paint from multiple angles without a real risk of cracking or breaking.
There’s a chemistry reason behind the porosity too. Firing clay to bisque temperature removes the water that’s chemically bound in the clay body, and that removal is what opens up the tiny pores across the surface that allow paint and glaze to grip properly.
Skipping straight to a higher firing temperature would close those pores too early, which is part of why bisque firing sits at a specific, deliberately lower range than a final glaze firing.
What Happens After You Paint It
Once you’ve finished decorating a ready to paint piece, it isn’t done yet, even though it might look complete sitting on the table in front of you. The paint or glaze needs a second firing to become permanent, waterproof, and food safe if that matters for the piece you’ve made.
This second firing is where the real transformation happens. Colours that looked chalky, pale, or almost dull while wet on the bisqueware often shift noticeably once fired, sometimes becoming brighter, sometimes settling into a slightly different shade than what you saw going in.
That shift can genuinely surprise first-timers, and it’s part of why many studios show sample tiles of fired colours next to the paint options, so you have a realistic idea of what you’ll actually end up with rather than judging purely by the wet colour in front of you.
Turnaround for that final firing varies depending on the studio’s kiln schedule, but it’s rarely instant, since kilns are usually run in batches once there are enough pieces ready to fill a load efficiently.
What You Can Expect To Pay And How Long It Takes
Pricing for a ready to paint ceramics session typically covers the piece itself, studio time, paints or glazes, and the final firing, though exactly how that’s bundled varies from one studio to the next. Simpler pieces like mugs or small dishes tend to sit at the lower end, while larger or more detailed sculptural pieces cost more because of the extra clay and kiln space involved.
Most sessions themselves take somewhere between thirty minutes and a couple of hours, depending on how detailed you want to get with the design. A simple one-colour piece can be finished quickly, while intricate patterns or blended shading naturally take longer.
The part that catches people off guard more often than price is the wait for the final firing. It’s genuinely common for a finished, painted piece to need anywhere from a few days to a couple of weeks before it’s ready to collect, since it has to wait its turn in a kiln load alongside other members’ work.
In our experience, most visitors are happy to wait once they understand why, especially when they realise that wait is what actually makes their finished piece durable and safe to use rather than just decorative.
What Competing Guides Leave Out
A lot of general guides to paint-your-own pottery gloss over the practical difference between ceramic paint and everyday acrylic paint on a bisqueware surface. Ceramic paint and underglaze are formulated to survive the second firing and bond permanently with the fired surface, while ordinary craft acrylic simply sits on top and was never designed to be fired at all.
That distinction matters because a piece decorated with acrylic paint instead of proper ceramic paint typically skips the final firing entirely, which changes both how durable the finish is and whether the piece is safe to use with food or drink.
Another gap worth naming honestly is realistic turnaround expectations. Many articles talk about the painting session itself in detail but barely mention that the final firing adds real time before you actually get to take your piece home, which can be a genuine surprise if nobody mentions it upfront.
Studios also vary in how they communicate collection timelines, so it’s always worth asking directly rather than assuming your piece will be ready the same day, since that assumption is one of the more common sources of disappointment for first-time visitors anywhere.
Choosing A Ready To Paint Piece For Your First Try
If you’re new to this, starting with a simple form like a mug, small bowl, or basic figure is genuinely a good idea rather than jumping straight to something with lots of fine detail or intricate shapes. Simpler forms are more forgiving while you get a feel for how the paint behaves on a porous surface.
It also helps to pick a piece you’ll actually use or enjoy displaying afterward, rather than choosing based on price alone. A piece you’re excited about tends to get more thoughtful attention during the painting stage, which usually shows in the final result.
Don’t be afraid to ask studio staff which colours tend to fire most reliably or vibrantly, since that kind of practical, experience-based advice can genuinely shape how happy you are with the outcome. Most studio staff, including the team at Le Studio Art Space, are happy to walk newcomers through those choices before they start.
Above all, treat your first ready to paint session as a chance to learn how the whole process feels, rather than expecting a perfect result the very first time. Many potters find their second or third piece turns out noticeably better simply because they understand the medium a little more by then.

Ready to try a ready to paint ceramics session for yourself? Visit Le Studio Art Space in Mordialloc and pick out a piece to decorate at your own pace.
Frequently Asked Questions
Is painting bisqueware actually different from painting on something like paper or canvas?
Yes, genuinely different. The porous surface of bisqueware absorbs paint much faster than paper or canvas, so brush strokes behave differently and colours often look more muted while wet than they do once fired.
Do I really need special ceramic paint, or can I just use whatever craft paint I have at home?
If you want a durable, food safe, permanently fired finish, you’ll need proper ceramic paint or underglaze made for firing. Regular craft acrylic can technically be used decoratively, but it won’t be fired and won’t hold up the same way over time.
What if I mess up the design halfway through, can I fix it before firing?
In many cases, yes, especially with underglaze, since mistakes can often be wiped away or painted over while the piece is still unfired. Once it’s fired, though, the design becomes permanent, so it’s worth taking your time before that final step.
Why does the finished colour never look quite like what I painted?
This comes down to how ceramic paints and glazes chemically transform under heat during firing. Many studios, including Le Studio Art Space, keep fired sample tiles on hand so you can see a more accurate preview before committing to a colour.
How long will I actually have to wait to pick up my finished piece?
It varies by studio and kiln schedule, but a wait of several days to a couple of weeks after your session is fairly typical, since pieces are usually fired in batches rather than one at a time.
This article is provided for general educational purposes by Le Studio Art Space and reflects common studio practice. Individual results, pricing, and timelines may vary by studio and by piece.