Slip casting molds are hollow plaster forms that shape liquid clay, called slip, into consistent, repeatable ceramic pieces without a wheel or hand building. The plaster absorbs water from the slip against its inner walls, building up a solid layer of clay that thickens the longer it sits before the excess liquid is poured back out. Potters use this method to produce matching dinnerware sets, small sculptural editions, and other forms that would be difficult or impossible to make identically by hand.
If you have only ever thrown on the wheel or built by hand, watching someone pour liquid clay into a plaster mold and pull out a perfectly formed cup a day later can look like a completely different craft. It is related, but it runs on its own logic. Here at Le Studio Art Space in Mordialloc, slip casting comes up regularly with members who want repeatable forms rather than one-off pieces, so here is how slip casting molds actually work, plain and simple.
What Slip Casting Is
Slip casting is a forming method that uses liquid clay, called slip, poured into a plaster mold rather than clay shaped by hand or on a wheel. Where wheel throwing depends on centering and hand-eye coordination and hand building depends on pinching, coiling, or slabbing clay into shape, slip casting depends almost entirely on the mold itself. Every piece poured from the same mold comes out essentially the same size and shape, which is the whole point of the method.
That makes it fundamentally different in mindset too. Wheel throwing and hand building are inherently one-off, even when you are trying to make a matching set, small variations creep in every time. Slip casting trades that individual character for consistency, which matters enormously for dinnerware sets, editioned sculptural work, or anything where uniform results matter more than the visible hand of the maker.
It’s also worth being clear that slip casting isn’t a shortcut or a lesser technique compared to throwing or hand building, it’s simply suited to different goals. A skilled slip caster still needs a genuine understanding of clay behaviour, timing, and finishing to get clean, professional results, the skill just shows up in different places than it does at the wheel.
How A Slip Casting Mold Actually Works
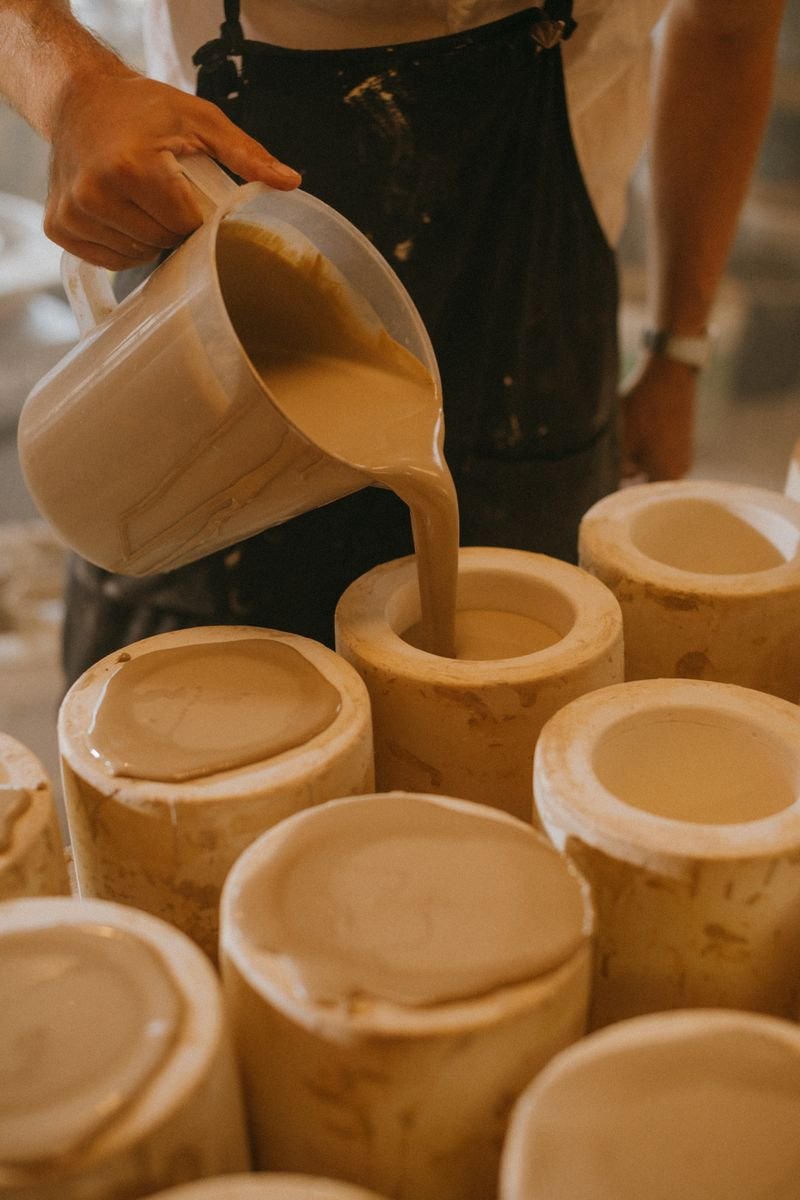
The process starts with liquid clay slip poured into a dry plaster mold. Plaster is porous, so it immediately starts pulling water out of the slip through capillary action, and clay particles build up against the mold’s inner wall as that water is absorbed. The longer the slip sits in the mold, the thicker that clay wall becomes.
Once the wall has reached the thickness you want, usually checked by timing or by feel through an access point, the excess liquid slip is poured back out, leaving a hollow cast piece behind. The piece then needs to firm up further as the plaster keeps drawing moisture out, until it has shrunk away from the mold wall enough to be removed cleanly. Rush that stage and you risk warping or cracking a piece that looked perfectly fine a few minutes earlier.
Humidity and ambient temperature in the studio also play a real role in how predictably a mold behaves, since plaster’s absorption rate shifts with the moisture already in the air. A mold that pulls water quickly on a dry day might work noticeably slower during a humid stretch, which is part of why experienced slip casters tend to judge timing by feel and by checking the piece rather than relying purely on a stopwatch.
What Slip Casting Molds Are Made From
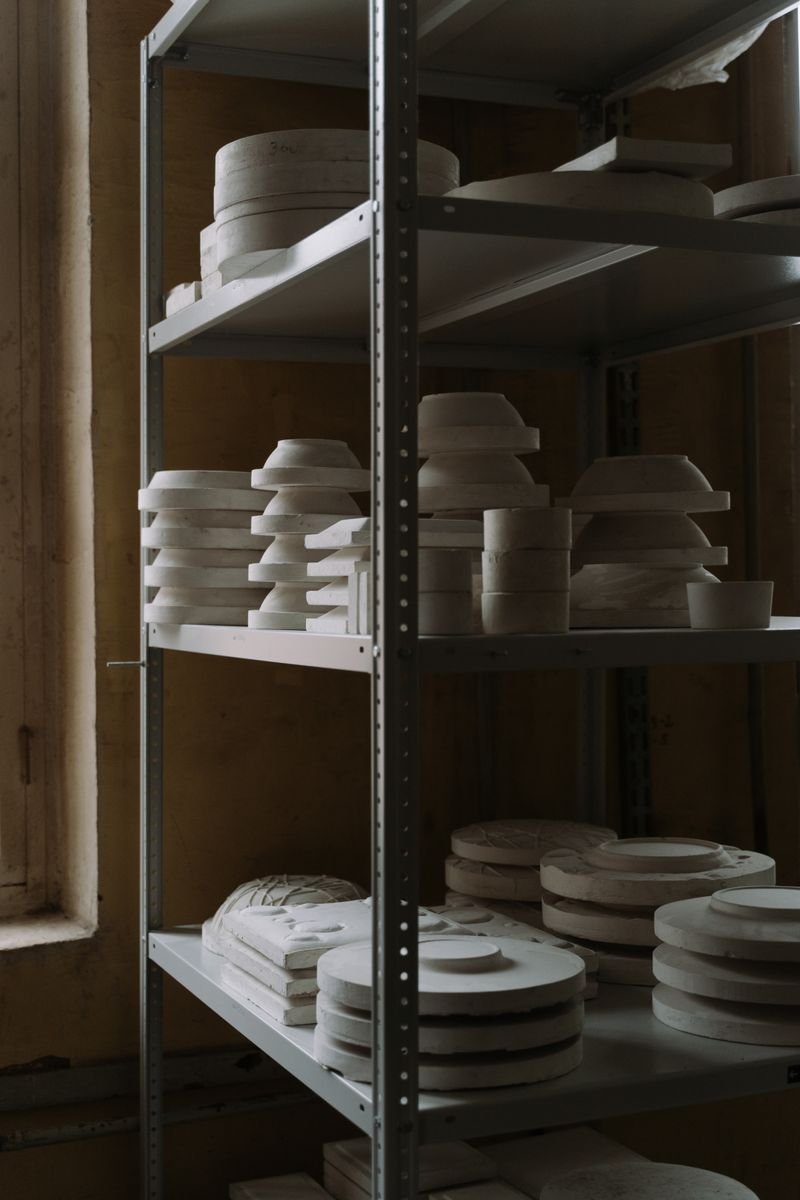
Almost all slip casting molds are made from plaster of paris, mixed to a specific ratio of plaster to water and poured around a model to capture its shape in reverse. Plaster is used because of its absorbency, no other common material pulls water out of clay slip anywhere near as reliably or evenly.
Simple forms with no undercuts can be cast from a single-part mold, essentially one plaster block with a cavity inside. Anything with handles, complex curves, or undercuts needs a multi-part mold, several plaster sections that key together and get strapped tight before pouring, then separated afterward to release the piece cleanly. Multi-part molds leave faint seam lines on the finished piece that most potters clean up with a damp sponge or scraping tool before the piece dries fully.
What You Can Make With Slip Casting
Slip casting shines wherever repeatability matters more than individual variation. Matching dinnerware sets are the classic example, six identical bowls or a full set of mugs that actually match, something that is genuinely difficult to achieve reliably by hand. Small sculptural editions work well too, since a single well-made mold can produce dozens of consistent castings before it wears out.
It also opens up forms that would be awkward or impractical any other way, thin-walled hollow pieces, complex figurative shapes, or anything with fine detail that a mold can capture more precisely than fingers or wheel-thrown walls typically can.
Slip casting also suits collaborative or production-style work particularly well, where one person might specialize in mold making while another focuses on casting, trimming, and finishing. That division of labour is much harder to replicate with wheel throwing or hand building, where a single maker typically sees a piece through from start to finish, which is part of why slip casting shows up so often in small production studios rather than purely one-off art practices.
What Competing Guides Leave Out
Most guides to slip casting focus on the technique in isolation and skip the parts that actually trip up beginners in a real studio setting. Drying times are one of the biggest gaps. Online guides often give a single number for how long slip should sit in a mold, but that time genuinely shifts with humidity, plaster age, and the specific slip recipe being used, so treating any published number as gospel usually leads to overly thin or overly thick walls.
Demolding mistakes are another gap worth naming honestly. Pulling a piece too early, before it has shrunk enough to release cleanly, is probably the single most common beginner error, and it usually ends with a cracked or distorted piece rather than a ruined mold. The other gap is context. Most online guides are written from a home hobbyist’s solo perspective, but in a shared studio setting like ours at Le Studio Art Space’s Ceramic Studio, slip casting also means coordinating mold access, drying space, and slip supply with other members, which changes how you plan a casting session.
Slip Casting Versus Wheel Throwing And Hand Building
None of these methods is objectively better, they solve different problems. Wheel throwing is faster for round, symmetrical forms and gives you direct, immediate control over the shape as you work, but it takes real practice to get consistent results and it caps out at forms a wheel can actually produce. Hand building is the most flexible in terms of shape, since you are not limited by rotational symmetry or a mold’s constraints, but it is slow and every piece is unique even when you are trying to match a set.
Slip casting sits in its own lane. It trades speed and hands-on shaping for repeatability and access to complex forms, which makes it the right choice specifically when you need multiples of the same piece or a shape that would be genuinely difficult to achieve by hand. Many potters end up using all three methods for different projects rather than treating them as competitors, and once a piece is cast and trimmed it still needs the same bisque and glaze firing as anything else made in the studio, which is where our Firing Service comes in.
Cost is worth factoring into that comparison too. Wheel throwing and hand building need comparatively little specialized equipment beyond basic tools and a wheel, while slip casting requires plaster, a model to cast from, and often dedicated drying space for molds between uses. That upfront investment is part of why trying the technique through a studio before committing to your own equipment makes so much practical sense for most beginners weighing up which method to learn first.
The best way to actually understand slip casting is to watch a mold get poured and pull a piece yourself. Come see slip casting demonstrated and try it hands-on at Le Studio Art Space’s ceramic studio in Mordialloc, whether that means joining a class or asking about a shared studio session built around it.
Frequently Asked Questions
Is slip casting harder or easier than wheel throwing for a beginner?
It is genuinely a different skill rather than harder or easier outright. Wheel throwing demands a lot of hand coordination up front, while slip casting demands patience with timing and careful handling once a piece comes out of the mold, so many beginners actually find it more approachable than they expected.
How long does clay actually need to sit in a slip casting mold?
This varies with humidity, the plaster’s age, and your specific slip recipe, so there is no single universal answer despite what some guides claim. In our experience, checking a test piece and learning your particular mold and slip combination matters far more than following a fixed timer.
Can I make my own slip casting molds at home?
Yes, mold making is a learnable skill and plenty of potters make their own plaster molds from a model, though it does take practice to get clean, well-fitting multi-part molds. Starting with a simple single-part mold is the easiest way to get a feel for the process before attempting anything more complex.
Why did my piece crack when I tried to take it out of the mold?
This almost always means the piece was demolded too early, before it had shrunk away from the plaster enough to release cleanly. Letting a piece firm up a little longer than feels necessary is usually the fix, even though it can be tempting to rush a piece you are excited to see.
Do slip casting molds wear out over time?
Yes, plaster molds have a limited lifespan since repeated soaking gradually wears down the mold’s absorbency and crisp detail. Most molds are good for dozens of castings before the results noticeably soften, though exact lifespan depends on how carefully they are dried and stored between uses.
Is slip casting something I could actually try at Le Studio Art Space?
Yes, slip casting comes up in some of our classes and studio sessions, and it is worth asking directly about current mold access and scheduling. It is a genuinely fun process to see in person even before you try it yourself.
This article is provided for general educational purposes by Le Studio Art Space and reflects common studio practice. Results can vary with specific molds, slip recipes, and studio conditions, so treat the timings and techniques described here as a starting point rather than an exact recipe.