The best beginner easy clay models are small, simple, and chunky, such as pinched animals like birds, owls, and snails, basic figures, pinch pots, trinket dishes, and small bowls. They use simple hand techniques like pinching, rolling, and smoothing, need no wheel, and have thick, forgiving walls that are more likely to survive drying and firing.
Your first time with clay can feel exciting and slightly intimidating at the same time. Where do you even start? The good news is that some of the most satisfying beginner easy clay models are also the simplest, and you don’t need a pottery wheel, special tools, or any artistic background to make them.
At Le Studio Art Space in Mordialloc, these are the kinds of projects we suggest in our intro hand building sessions. This guide shares low pressure starter models to try, the basic techniques you’ll use, and, crucially, how to make pieces that actually survive the kiln, which is the bit most beginner guides forget to mention.
What Makes A Clay Model Beginner Friendly
A beginner friendly clay model starts with a simple form. Round, compact shapes like balls, eggs, and teardrops are much easier to make and far sturdier than long, thin, or spiky ones. Many of the cutest beginner models are really just a ball of clay with a few small details added.
Thick, even walls help too. Very thin clay can crack, warp, or break easily, especially while drying. Walls that are a little chunky, roughly the thickness of your finger or slightly less, are much more forgiving for a first attempt.
Forgiving shapes are another big factor. Organic, slightly irregular forms like stones, leaves, and animals look charming even if they’re not perfectly symmetrical. That takes the pressure off, since a lopsided owl still looks like an owl.
Finally, beginner friendly models avoid fragile parts that stick out. Thin legs, long tails, and delicate fingers are common breaking points. Tucking limbs close to the body, or leaving them out entirely, makes a model far more robust.
Size matters too. A model roughly the size of your palm is big enough to add detail but small enough to finish in a single session. It’s also much less likely to crack than something large and ambitious.
Beginner Easy Clay Models: Simple Animals And Figures To Try
Small pinched animals are a classic first project. A little bird is a great example: pinch a ball into a slightly pointed egg, add a tiny beak, press in two eyes with the end of a pencil, and add texture for feathers with a fork or tool.
Owls are another favourite. Their round, compact bodies suit clay beautifully, and their big eyes and feather textures give plenty of character. Hedgehogs, turtles, snails, and sleeping cats curled into a ball all work for the same reason.
Simple figures are also worth a try. A small person can be made from a rounded body, a ball for a head, and arms pressed close to the sides. Keep it chunky and seated, rather than standing on thin legs, so it stays stable.
If you’d like to go a bit further, our guide on what a ceramic figurine is explains how small figures are made and finished. For more ideas, our article on clay art ideas to try in the studio is full of inspiration.
A handy trick is to work from a photo or a simple sketch. Looking at a real bird or cat while you sculpt helps you notice proportions, like how big the head is compared to the body, and those small observations make a model look much more convincing without any extra technical skill.
Useful Beginner Easy Clay Models For Everyday Use
Not every first model has to be decorative. Pinch pots are one of the oldest and simplest pottery forms. Start with a ball of clay, press your thumb into the centre, and gently pinch and turn to open the walls into a little bowl.
Trinket dishes are another great beginner project. Roll a slab of clay to an even thickness, cut a circle or leaf shape, and gently lift the edges. They make lovely gifts for holding rings, keys, or small treasures.
Small bowls can be made by pinching, or by pressing a slab of clay into a shallow mould, like a plastic bowl lined with a cloth. This gives you a neat shape while you focus on the edges and surface decoration.
Simple tea light holders, little vases, and spoon rests are also achievable first projects. They’re satisfying because you can use them at home once they’re fired. Our guide to clay projects perfect for a studio session has more ideas like these.
Techniques You Will Use
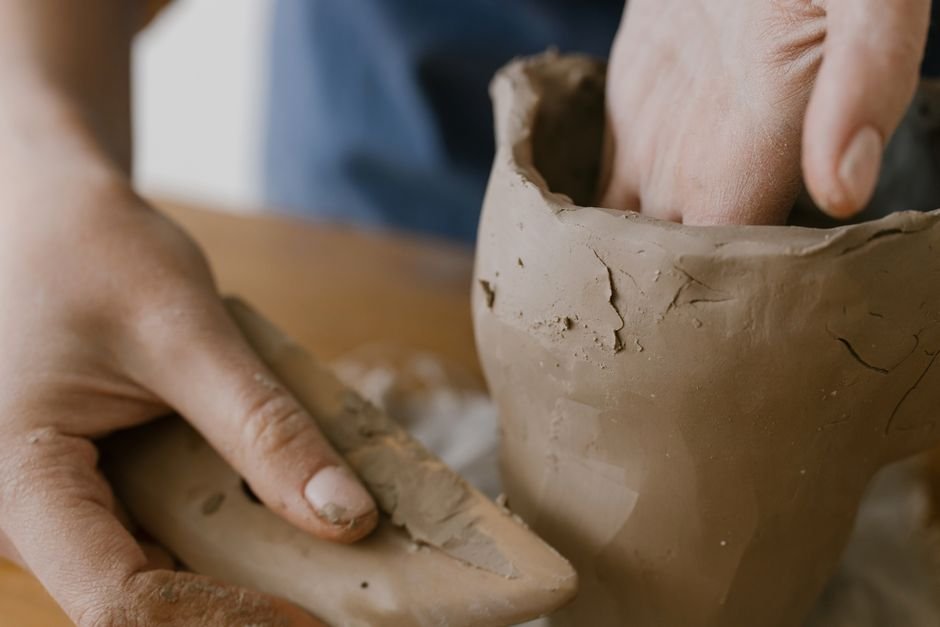
Pinching is the most basic hand building technique, and it’s the foundation for many beginner models. You simply press and squeeze the clay between your thumb and fingers, turning it as you go to keep the walls even.
Rolling is used to make coils, balls, and slabs. Rolling clay between your palms creates smooth balls, rolling on a table creates coils, and a rolling pin with two guide sticks helps make even slabs for dishes.
Joining pieces is where many beginners run into trouble. To attach a beak, ear, or handle, scratch both surfaces with a tool, add a little slip, which is clay mixed with water, and press them firmly together. This scoring and slipping technique makes joins much stronger.
Smoothing finishes the piece. A damp sponge, a finger dipped in water, or a soft rubber rib can smooth out cracks, fingerprints, and rough edges. Don’t overdo the water, though, since soggy clay is harder to work. Our guide to coil, slab, and pinch methods explains these techniques in more depth.
Texture is the fun final touch. Forks, toothpicks, lace, leaves, and stamps can all press patterns into the surface, adding detail without needing any drawing skills.
What Competing Guides Leave Out About Beginner Easy Clay Models
Most lists of beginner easy clay models focus on what to make, but skip what happens next. If you’re using kiln fired clay, your model has to survive drying and firing, and that changes how you should build it.
The biggest issue is thickness. Solid lumps of clay thicker than about two centimetres can trap moisture inside, which turns to steam in the kiln and can crack or even burst a piece. Larger animals and figures should be hollowed out from underneath once firm, or built around a hollow pinch pot.
Any enclosed hollow space needs a small hole, made with a needle tool or skewer, so air and steam can escape during firing. It can be hidden underneath or worked into the design, like a bird’s mouth.
Joins and uneven walls are the other common problems. Parts that aren’t scored and slipped often fall off during drying, and areas that are much thinner than the rest can crack. Our article on common hand building mistakes beginners make covers these in detail.
Finally, keep your expectations relaxed. Even with care, the occasional piece cracks or breaks. In our experience, beginners who treat first models as experiments enjoy the process far more than those chasing perfection.
Taking Your First Models Through Drying And Firing
Once you’ve finished shaping, your model needs to dry slowly. Loosely covering it with plastic for the first day or two helps thinner parts dry at a similar rate to the body, which reduces cracking.
When the model is completely dry, it goes into the kiln for its first firing, called the bisque firing. This turns it into hard, permanent ceramic. After that, it can be glazed or painted with underglaze and fired again.
If you’re working in a studio, the firing is usually handled for you. At Le Studio Art Space, pieces made in class go through our firing service, and members of our ceramic studio can fire their own work too.
The whole process can take a few weeks, but there’s nothing quite like holding your finished first model. Colours often look dull before firing and brighten in the kiln, so don’t worry if your painted model looks chalky at first. Our workshops and classes are a relaxed place to start.
Ready to make your very first clay model? Join a beginner session at Le Studio Art Space in Mordialloc, where we’ll guide you through simple shapes, strong joins, and getting your piece safely through the kiln.
Frequently Asked Questions
What is the easiest thing to make out of clay for a total beginner?
A pinch pot is often the easiest, since it only needs your hands and a ball of clay. Simple animals like birds or owls are also very achievable.
Do I need a pottery wheel to make clay models?
No. All the models in this guide are made by hand using pinching, rolling, and smoothing, which is often easier for beginners than the wheel.
Why did my clay model crack when it dried?
Usually because some parts dried faster than others, or a join wasn’t scored and slipped. Slow drying under loose plastic and well made joins help.
Can I make clay models at home without a kiln?
You can use air dry clay at home for decorative pieces, but it isn’t waterproof or as durable. For permanent models, you’ll need kiln fired clay and access to a kiln.
Is it okay if my first clay model doesn’t look very good?
Absolutely, and it’s completely normal. At Le Studio Art Space, we often see that first models are about learning how clay feels, and most people improve quickly with practice.
This article is provided for general educational purposes by Le Studio Art Space. Results vary with clay type, technique, and firing conditions.