Ceramic paint is any colour product made to bond with a ceramic surface, and it comes in two broad families. Fired products like underglazes and glazes melt into the clay in a kiln for a permanent finish, while unfired paints such as acrylic enamels air dry or cure in a home oven and stay decorative. Beginners usually paint thin, even coats onto clean bisqueware, then fire or cure the piece exactly as the label says.
Ceramic paint confuses almost everyone the first time. You walk into a craft shop or a paint your own studio, see shelves of little pots that all look alike, and quickly realise some need a kiln, some go in a kitchen oven, and some just dry on the bench. Picking the wrong one is the most common reason a first painted piece disappoints.
At Le Studio Art Space in Mordialloc we see plenty of first timers in our ceramic studio, and the questions are always similar. This guide walks through what ceramic paint actually is, which types need firing, how to prepare and paint a bisque piece, how to finish it, and a few things most beginner guides skip entirely.
What Ceramic Paint Actually Is
Ceramic paint is a loose label rather than one product. It covers anything designed to decorate fired clay, from studio underglazes and glazes to hobby enamels and paint pens. What they share is that they’re formulated to grip a ceramic surface, which ordinary craft paint isn’t really designed to do over the long term.
General acrylic craft paint will sit on bisque and look fine at first, but it has nothing to anchor it except the porous surface. It can scuff, peel when wet, and it can’t go anywhere near a kiln. Our guides on painting ceramic with acrylic paint and whether acrylic works on ceramic explain that trade off in more depth.
Studio ceramic paints are a different animal. Underglazes are coloured clay slips loaded with stains, so once fired they become part of the surface. Glazes are glassy coatings that melt in the kiln. These are what most pottery studios hand you at a paint your own table.
Hobby ceramic paints sit in between. They’re usually water based enamels or resin paints that cure at a low oven temperature or simply air dry. They’re handy for decorating store bought mugs at home, but the finish depends entirely on the brand and how well you follow its curing steps.
So the first question to ask isn’t which colour you like. It’s whether you have access to a kiln. That single answer narrows ceramic paint choices down to the right family straight away and saves a lot of wasted money.
Ceramic Paint That Needs Firing And Paint That Does Not
Fired ceramic paint includes underglaze, glaze, and specialty products like overglaze enamels and lustres. They all rely on heat to change chemically and fuse to the clay. Underglaze is usually covered with a clear glaze and fired again, which seals the colour under a glassy layer.
The big advantage of fired products is permanence. Once a glaze firing is complete, the colour won’t wash off or chip away like a surface coat can. Our explainer on glaze versus underglaze covers how studios combine the two for crisp, durable designs.
Unfired paints are air dry acrylics, enamel style hobby paints, and paint pens. Some simply dry at room temperature, while others are baked in a domestic oven at a fairly low temperature to harden the film. Either way, the paint sits on top of the surface rather than becoming part of it.
That’s why unfired finishes are best treated as decorative. They suit ornaments, planters for dry display, and art pieces, but they’re not a substitute for a kiln fired glaze on anything that will be handled hard or washed often. Our article on whether no bake ceramic paint pens work goes into the realistic limits.
A good rule of thumb is simple. If the product is sold for kiln use, it needs a kiln. If it’s sold for oven or air curing, never put it in a kiln, because it isn’t made for those temperatures and can burn out or release fumes.
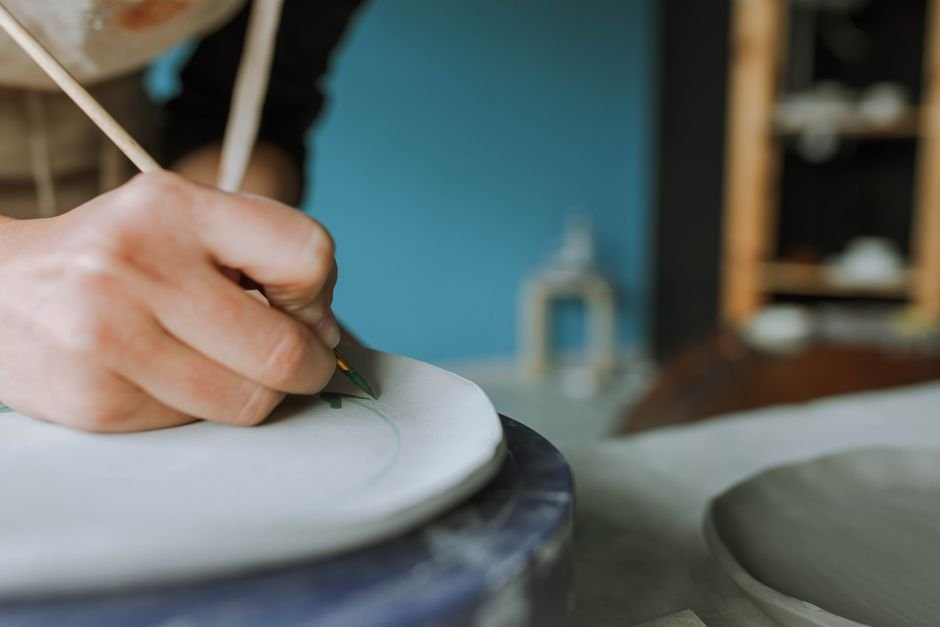
Preparing A Bisque Piece For Paint
Most beginners paint on bisqueware, which is clay that has been fired once and is hard but still porous. That porosity is what lets underglaze soak in and grip, so the surface needs to stay open and clean rather than sealed or greasy.
Start by wiping the piece with a damp, not wet, sponge. This lifts dust left from the kiln and from handling. Dust is the hidden culprit behind patchy colour and glaze that crawls away from bare spots after firing.
Handle bisque as little as possible once it’s clean. Hand cream, sunscreen and natural skin oils all act like a light resist, and you won’t see the problem until the piece comes out of the kiln with odd blank patches. Washing your hands before you start makes a real difference.
Let the piece dry for a few minutes after wiping. Painting onto damp bisque can make colours spread or look streaky, because the surface can’t absorb the paint properly while it’s still holding water.
If you’re working with unfired hobby paint on glazed ware instead, the preparation is different. A glossy surface needs degreasing with rubbing alcohol or warm soapy water, then a full dry, so the paint has something to cling to. Our guide on preparing ceramic bisque to paint covers both surfaces step by step.
Applying Paint Without Frustration
The biggest beginner slip up is loading the brush and painting one thick coat. Thick ceramic paint tends to crack, bubble or flake, and with underglaze it can make the clear glaze crawl off during firing. Thin layers always behave better.
Most underglazes need two or three coats for solid colour. Paint one coat, let it dry until the sheen disappears, then add the next, ideally brushing in a different direction each time. That cross hatching fills the gaps a single direction leaves behind.
Expect colours to look chalky and pale while you work. Many underglazes only reveal their true shade after the glaze firing, which is why studios keep fired sample tiles beside the paint. Trust the sample, not the wet pot.
Use the right brush for the job. Soft, full brushes lay down smooth colour, fine liners handle details and lettering, and a sponge dabber gives quick texture. Keep separate water for rinsing so light colours don’t turn muddy.
Mistakes on bisque can often be fixed. While underglaze is still dry and unfired, many potters gently scrape or sponge it back.
Finishing, Sealing, And Caring For Painted Pieces
What happens after painting depends on the product family. Underglazed bisque is usually dipped or brushed with clear glaze, then glaze fired. In a paint your own studio, staff handle that step and return the piece once it has cooled.
Oven cure paints follow their own schedule, typically baking at a set temperature for a set time, then cooling slowly inside the oven. Skipping or shortening this step is the most common reason hobby paint scratches off later.
Air dry paints often recommend a curing period of several days before the surface reaches full hardness. Some people add a clear varnish, though that also adds another layer that isn’t designed for food contact.
The label really matters here. It tells you whether a product is meant for decorative use only, how to cure it, and how it should be washed. If it doesn’t clearly state suitability for food or drink, treat the piece as decorative and keep it away from food use.
For care, gentle hand washing is the safest default for any painted piece. Avoid soaking, abrasive scrubbers and sudden temperature changes, and keep decorative pieces out of microwaves and dishwashers unless the manufacturer says otherwise.

What Competing Ceramic Paint Guides Leave Out
Most ceramic paint guides list products and stop there. They rarely explain why food use needs extra care. Whether a finished piece is suitable for food depends on the whole system: the glaze, the clay, the firing temperature and how well everything matured. Our article on why food safe glaze claims are not all equal unpacks that properly.
They also skip how firing works in a studio. When you paint at a studio, your piece joins a kiln load with other work, so there’s usually a wait of days rather than hours. At Le Studio, our firing service typically runs on a turnaround of around one to three weeks, depending on what’s in the queue.
Choosing a first colour set is another gap. Rather than buying a dozen shades, many beginners do better with a small palette: one dark for outlines, two or three mid tones, and white. Fewer colours make designs look more intentional and teach you how layering works.
Finally, almost nobody mentions practice tiles. Painting a scrap of bisque with your chosen colours and firing it first shows exactly how they’ll turn out. It’s a tiny step that prevents a lot of surprises on a piece you care about.
If you’d like to try fired ceramic paint without buying a kiln, a studio is the easiest route. Our ceramic studio and workshops and classes give beginners access to proper materials and firing.
Ready to put some colour on clay? Come and paint a piece at Le Studio Art Space in Mordialloc, then chat with us about getting it fired through our in-house firing service so your design comes out permanent.
Frequently Asked Questions
Can I just use regular acrylic paint on ceramic?
You can for decorative pieces, but it won’t be as durable as ceramic specific products. Acrylic can scratch or peel with washing, and it should never go in a kiln.
Does ceramic paint need to be fired?
Some does and some doesn’t. Underglazes and glazes need a kiln, while hobby enamels and paint pens air dry or cure in a home oven. Always check the label before you start.
Is ceramic paint safe to eat off?
Only if the product label clearly says the finished result is suitable for food contact and you follow its instructions exactly. If it doesn’t say so, treat the piece as decorative only.
Why does my paint look so pale before firing?
Many underglazes look chalky until they’re glazed and fired. The heat develops the true colour, which is why studios keep fired samples to show the final result.
Can Le Studio Art Space fire a piece I painted?
Le Studio Art Space runs a firing service for kiln suitable work. Get in touch first so we can check your piece and the products you used before it goes into a kiln.
This article is provided for general educational purposes by Le Studio Art Space. Product performance varies, so always follow the manufacturer’s instructions for application, firing or curing, and food contact suitability.